

Championship Golf

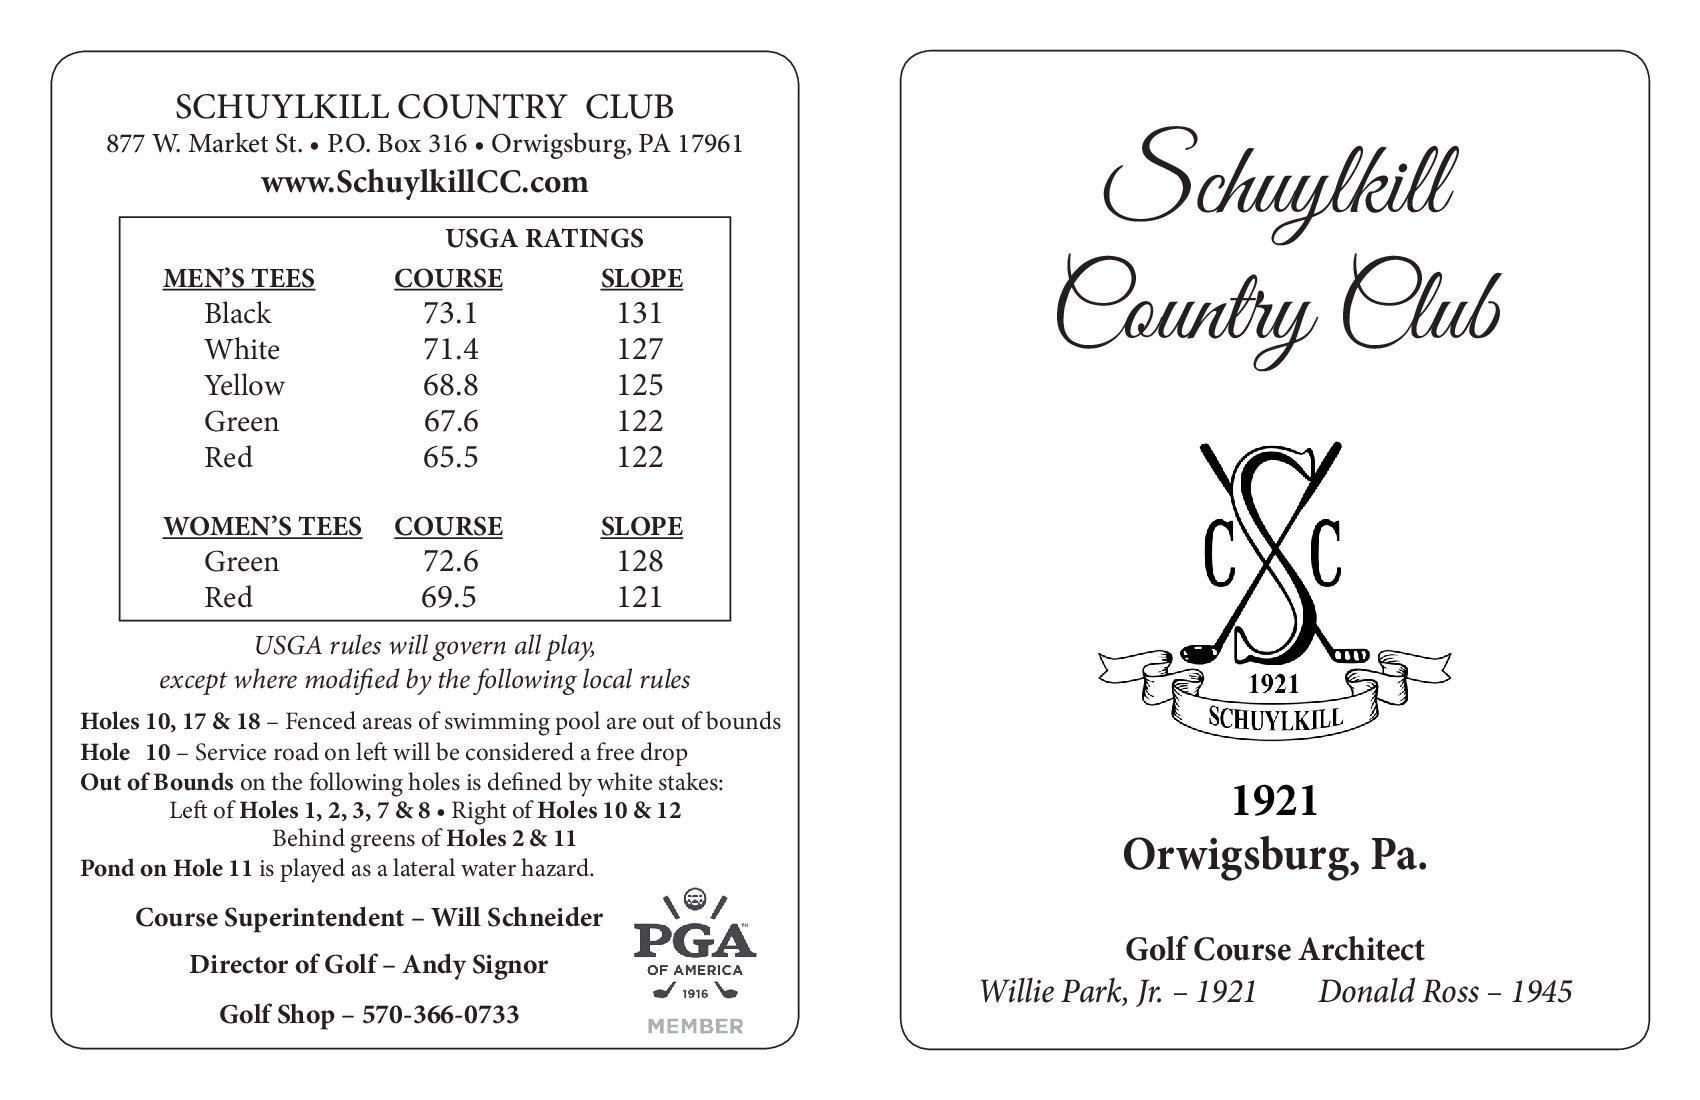
Founded in 1919 on a scenic property in Orwigsburg, PA, Schuylkill Country Club began as a 9-hole course designed by renowned architect Willie Park Jr. The course and clubhouse officially opened in 1921.
In the mid-1940s, the club expanded, and Donald Ross redesigned it into the 18-hole championship course known today. His layout is celebrated for its pristine playing conditions, peaceful atmosphere, and challenging yet enjoyable design.
Recognized as one of the premier courses in the Mid-Atlantic region, SCC offers a member-friendly experience where home course knowledge plays a key role in tournaments. The classic Donald Ross greens ensure a new challenge with every round. The club also hosts a variety of golf events and clinics for men, women, and juniors of all skill levels.
Friday, Saturday and Sunday, June 20, 21 and 22
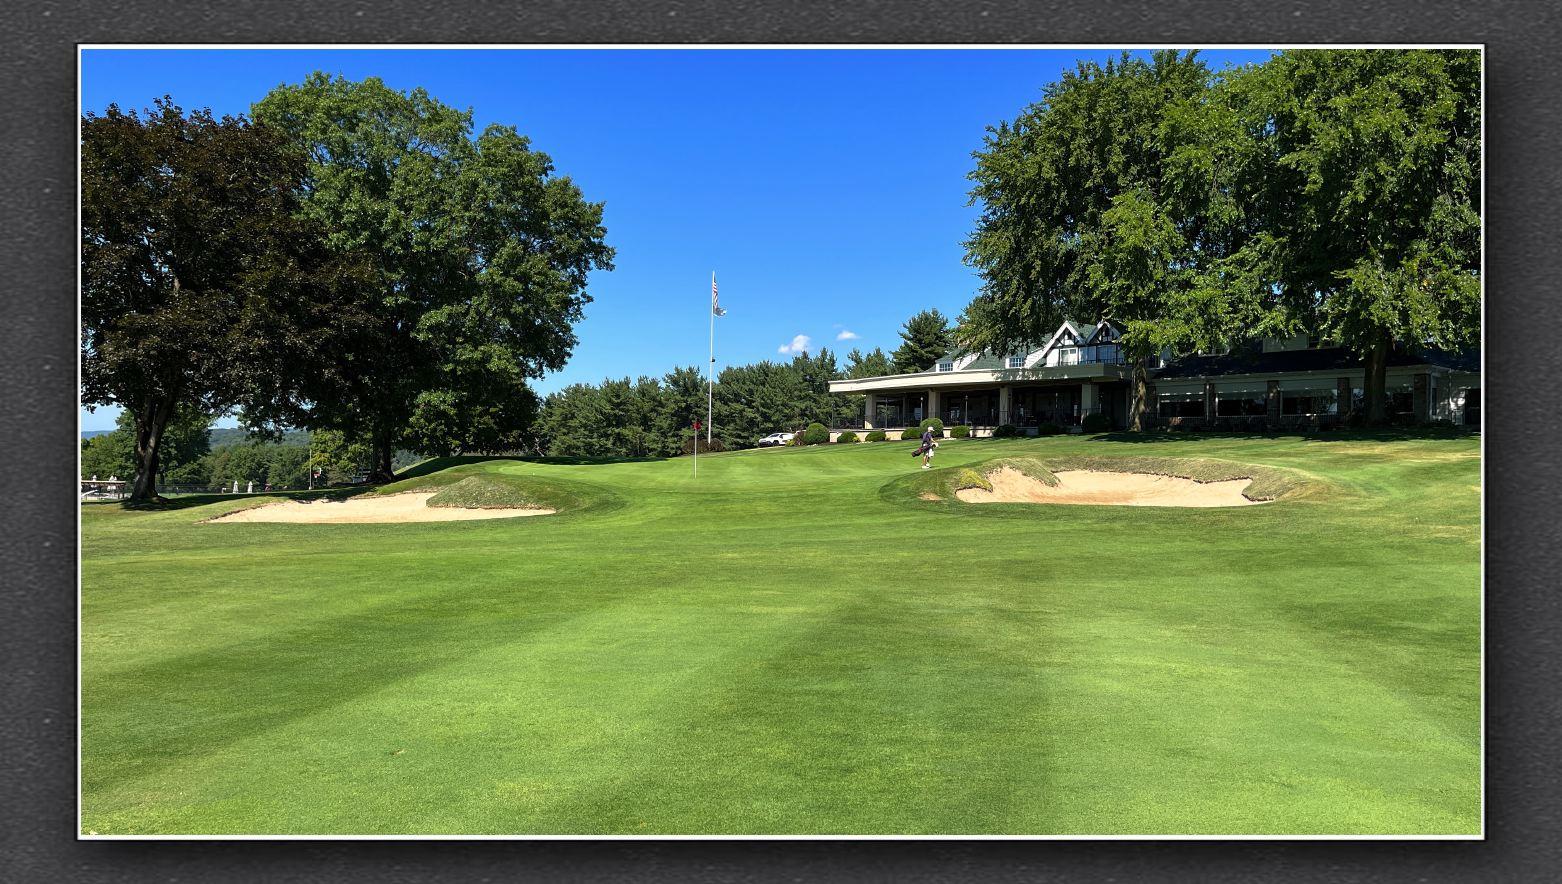
Photo Gallery
YouTube Video
Media Link
2026 Invitational
2026 Entry Form
Schuylkill Country Club
2026 Senior Invitational
2026 Senior Entry Form
Hole by Hole Information
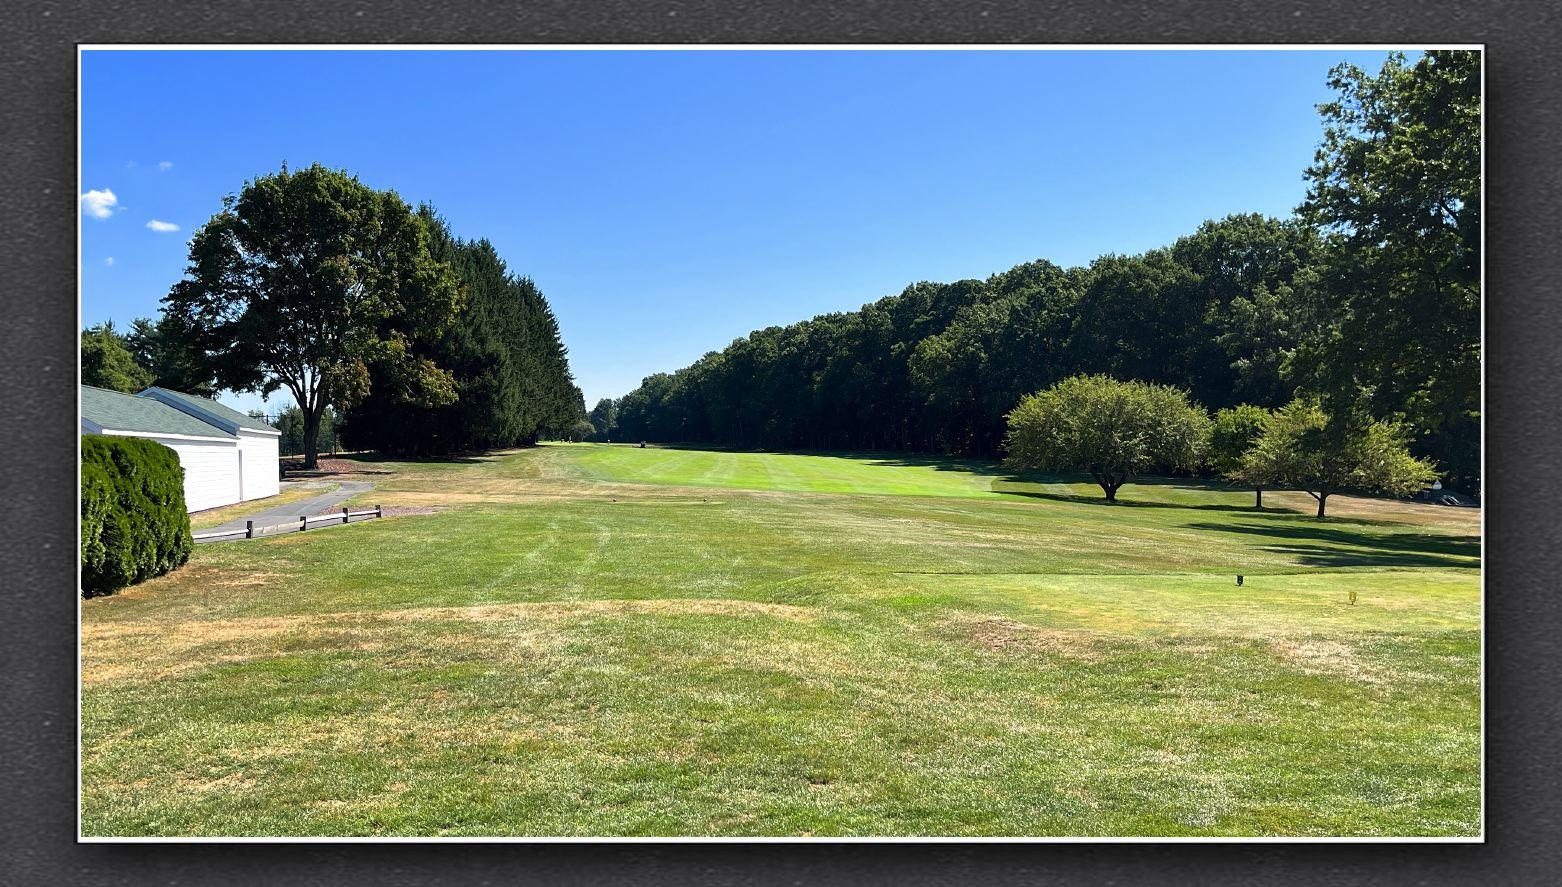
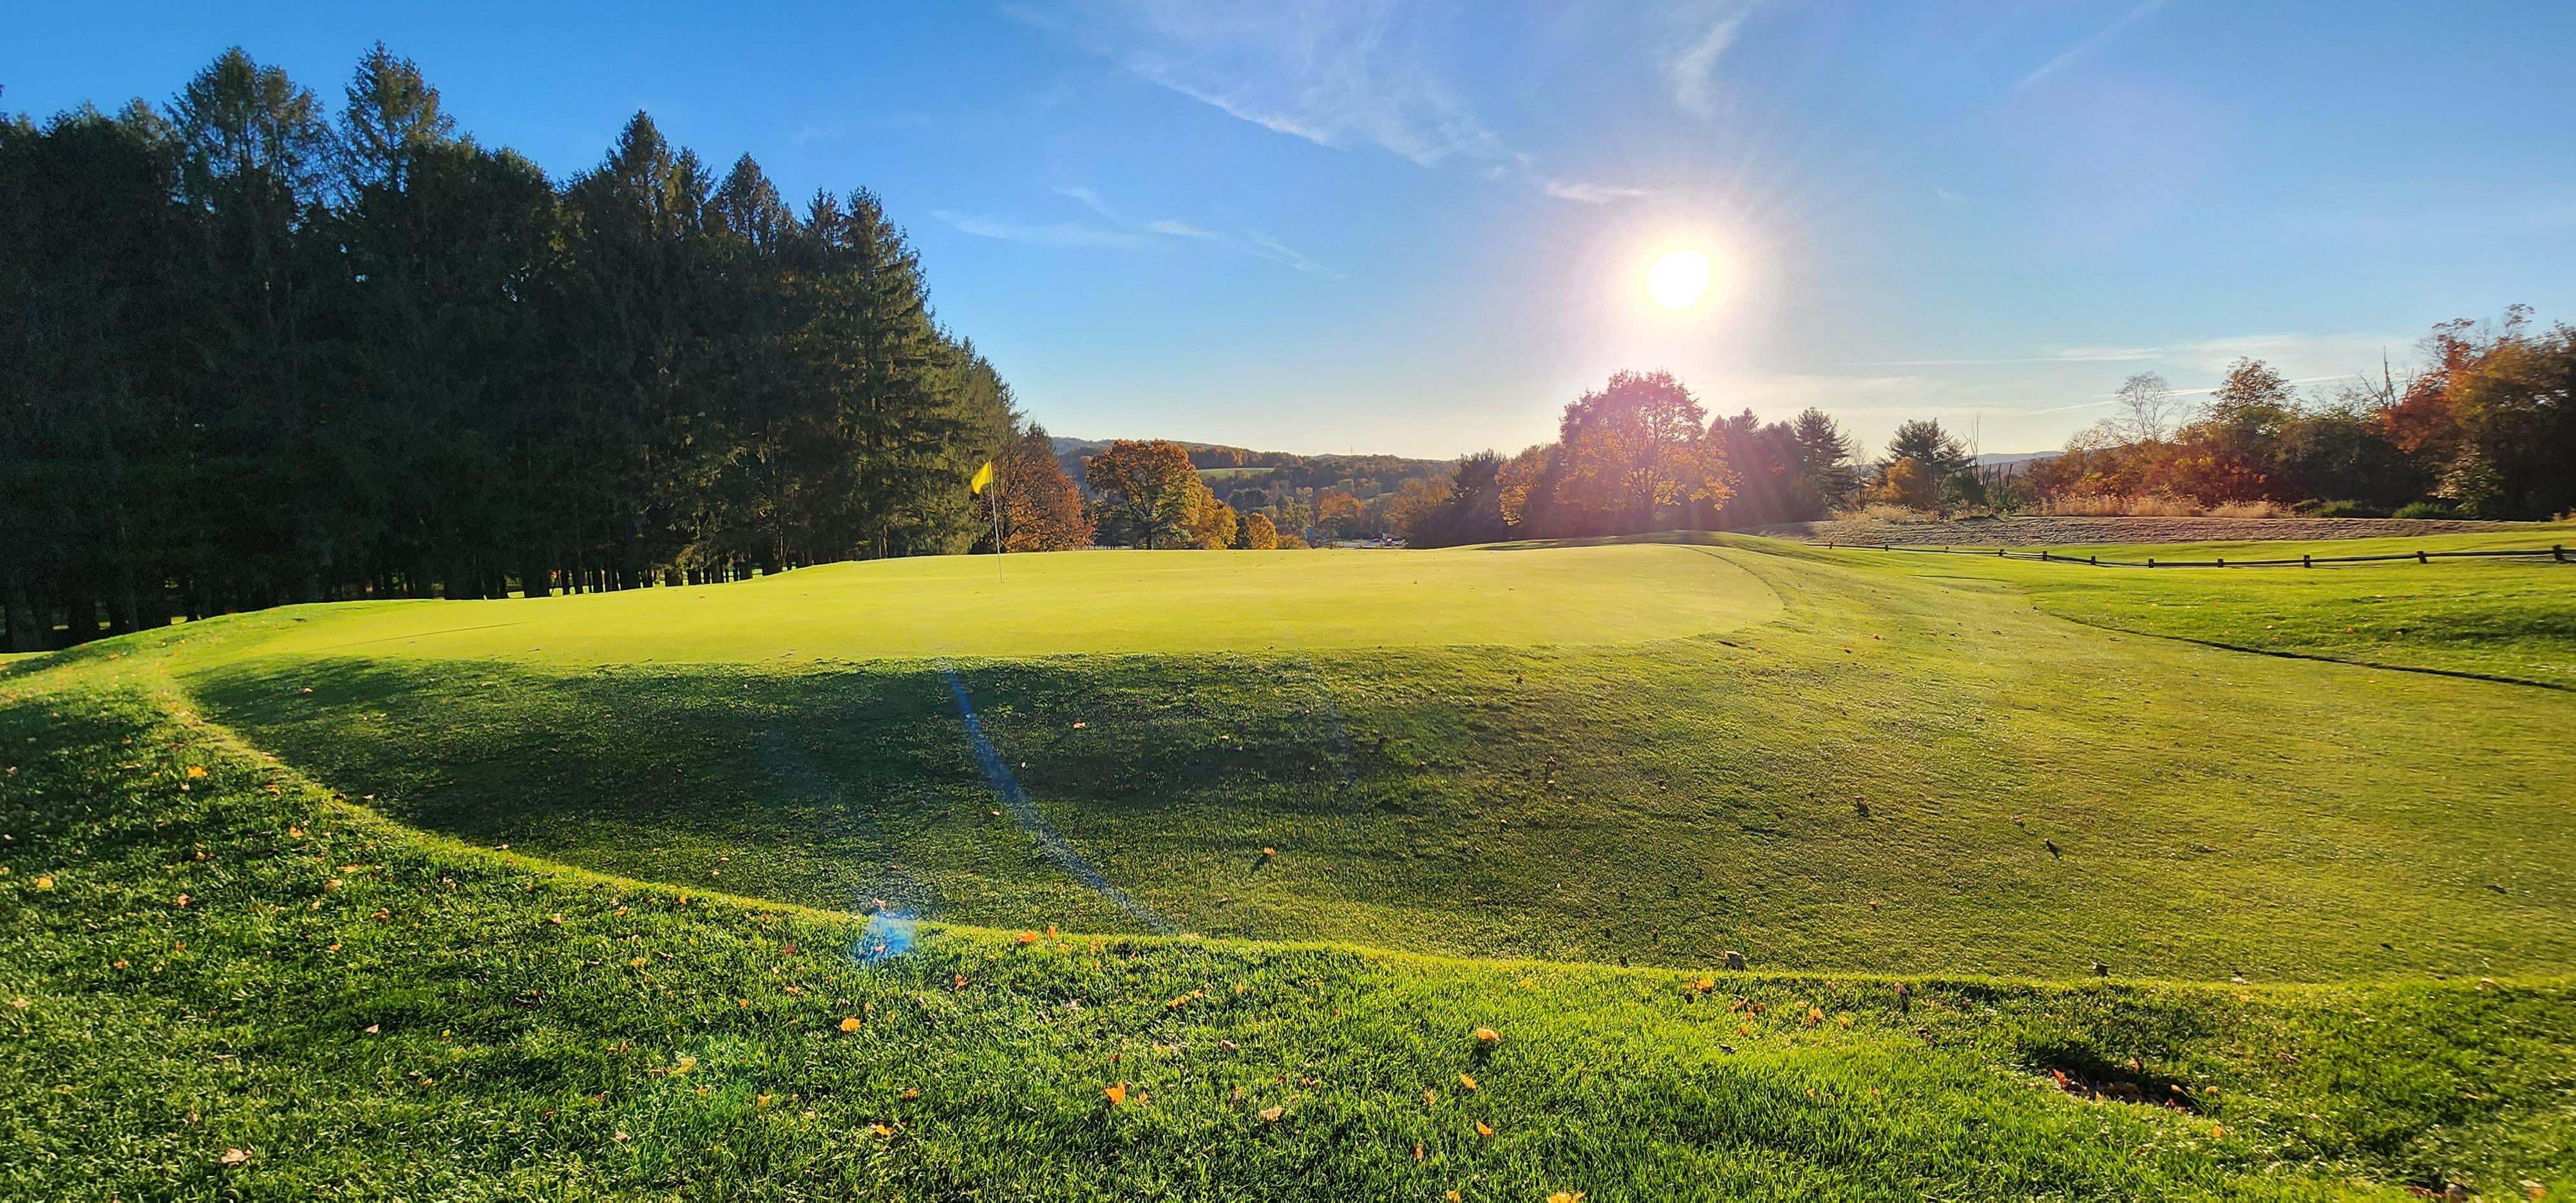
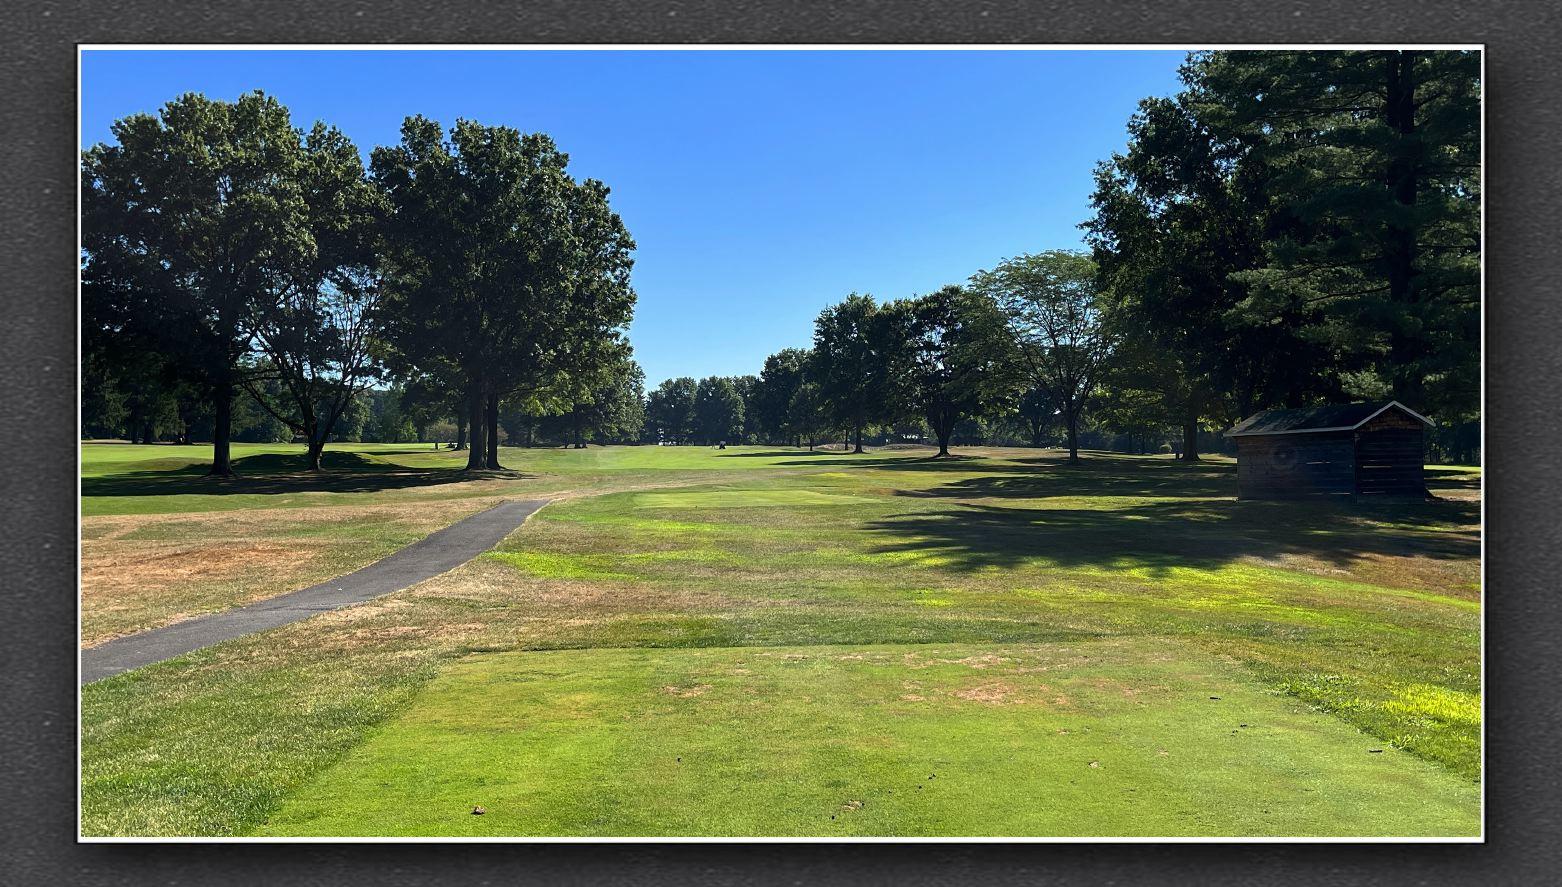
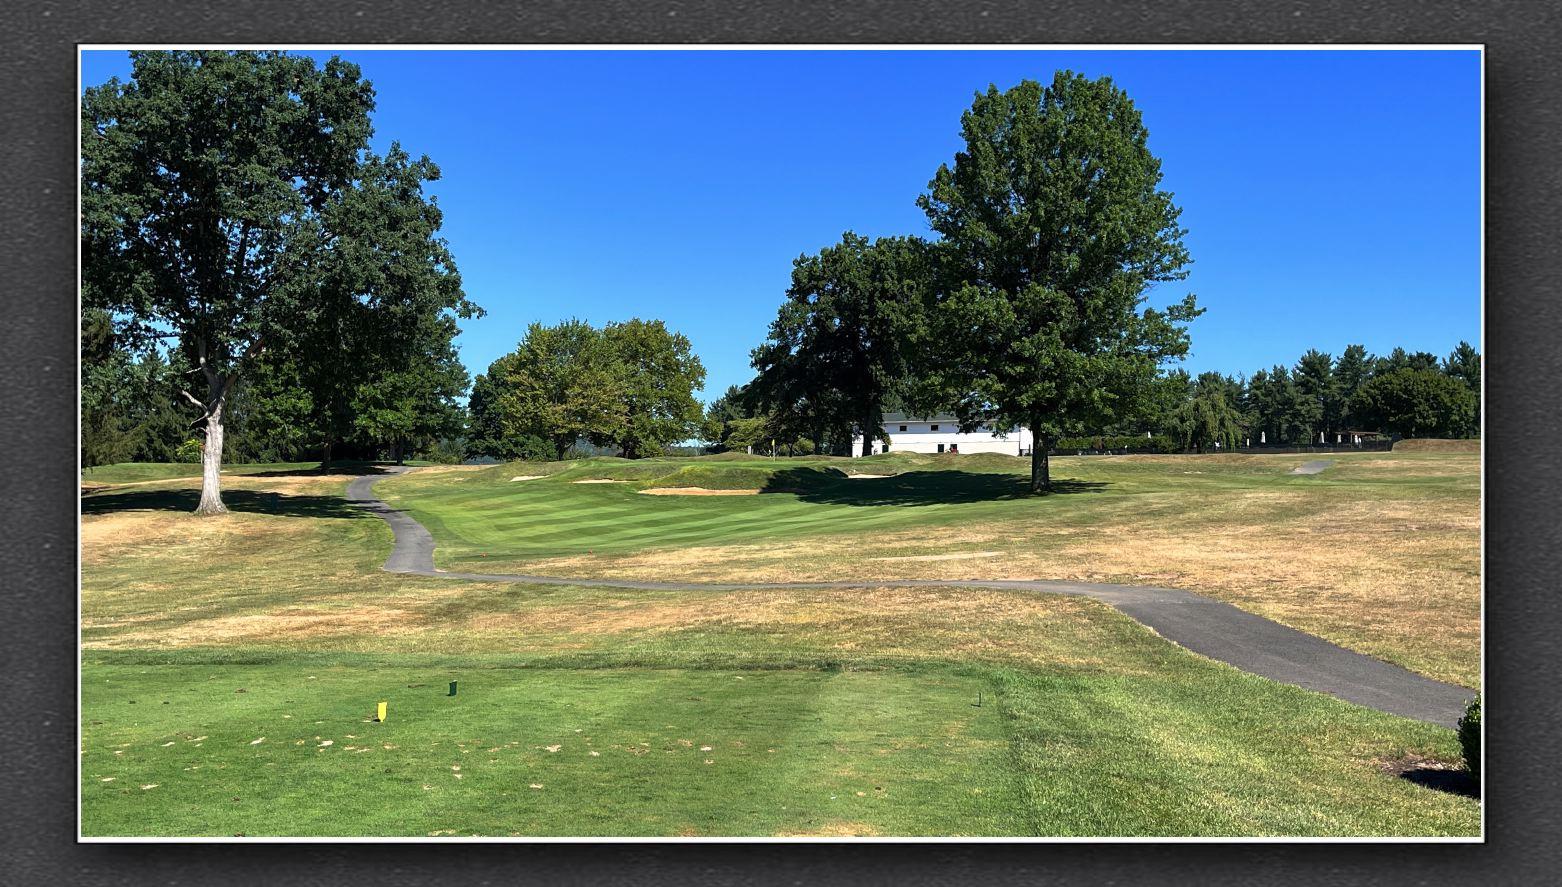
Hole 1
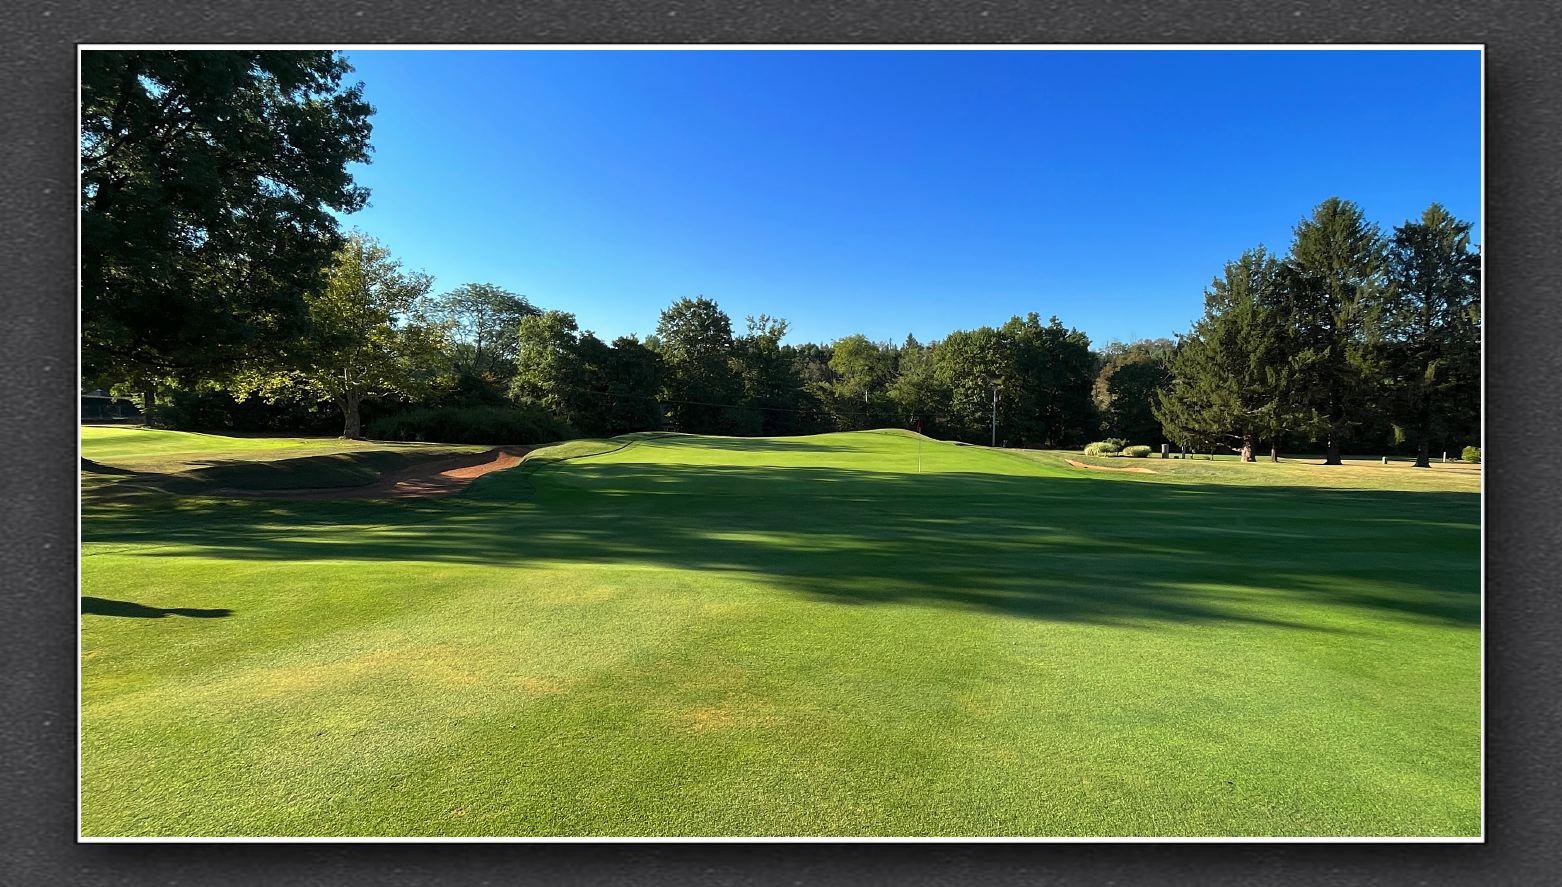
This Hole requires a solid, accurate tee shot to start your round off well. Favor the left side of the fairway to avoid the slope toward the right woods, but don’t risk the OB left. Once you’ve positioned your tee shot properly, aim for a controlled approach to the green, avoiding any over hit shots that could land you in trouble behind. Also watch out for the greenside bunker left of the green. This hole has a big green, so be sure to have great distance control. It’s a hole where precision and smart shot choices will set the tone for your game. |
|
|
|
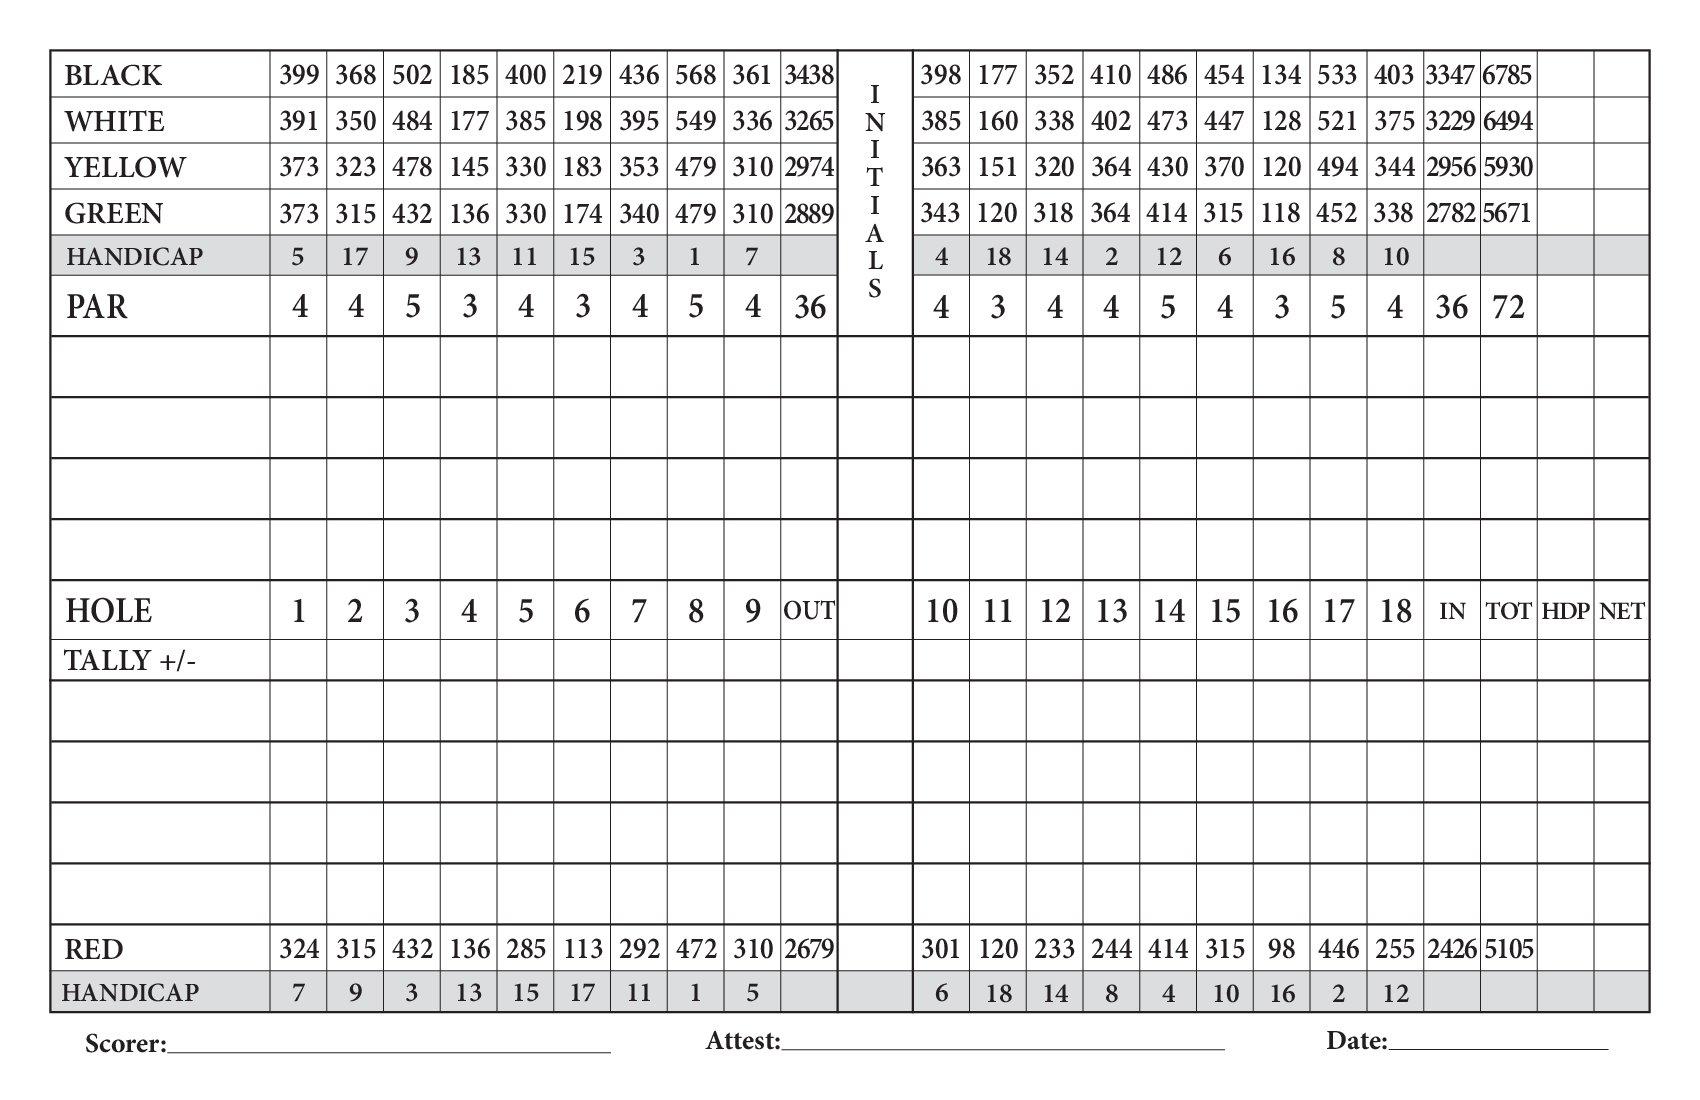
| Black | White | Yellow | Green | Red/Green |
| 399 | 391 | 373 | 373 | 324 |
| Par | Handicap | ||
|---|---|---|---|
| Men | Ladies | Men | Ladies |
| 4 | 4 | 5 | 7 |
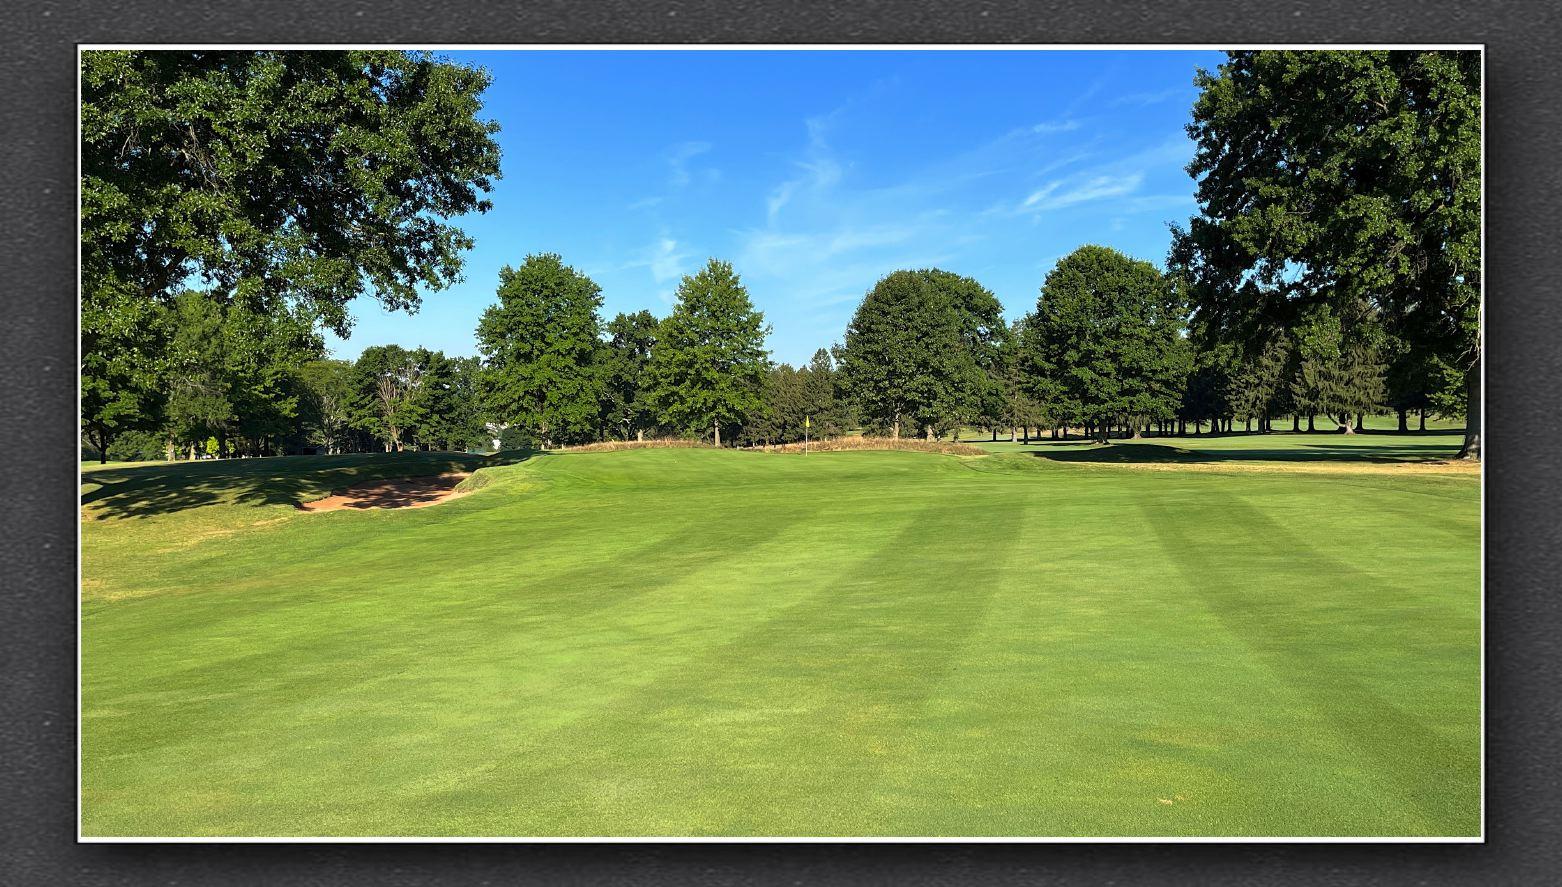
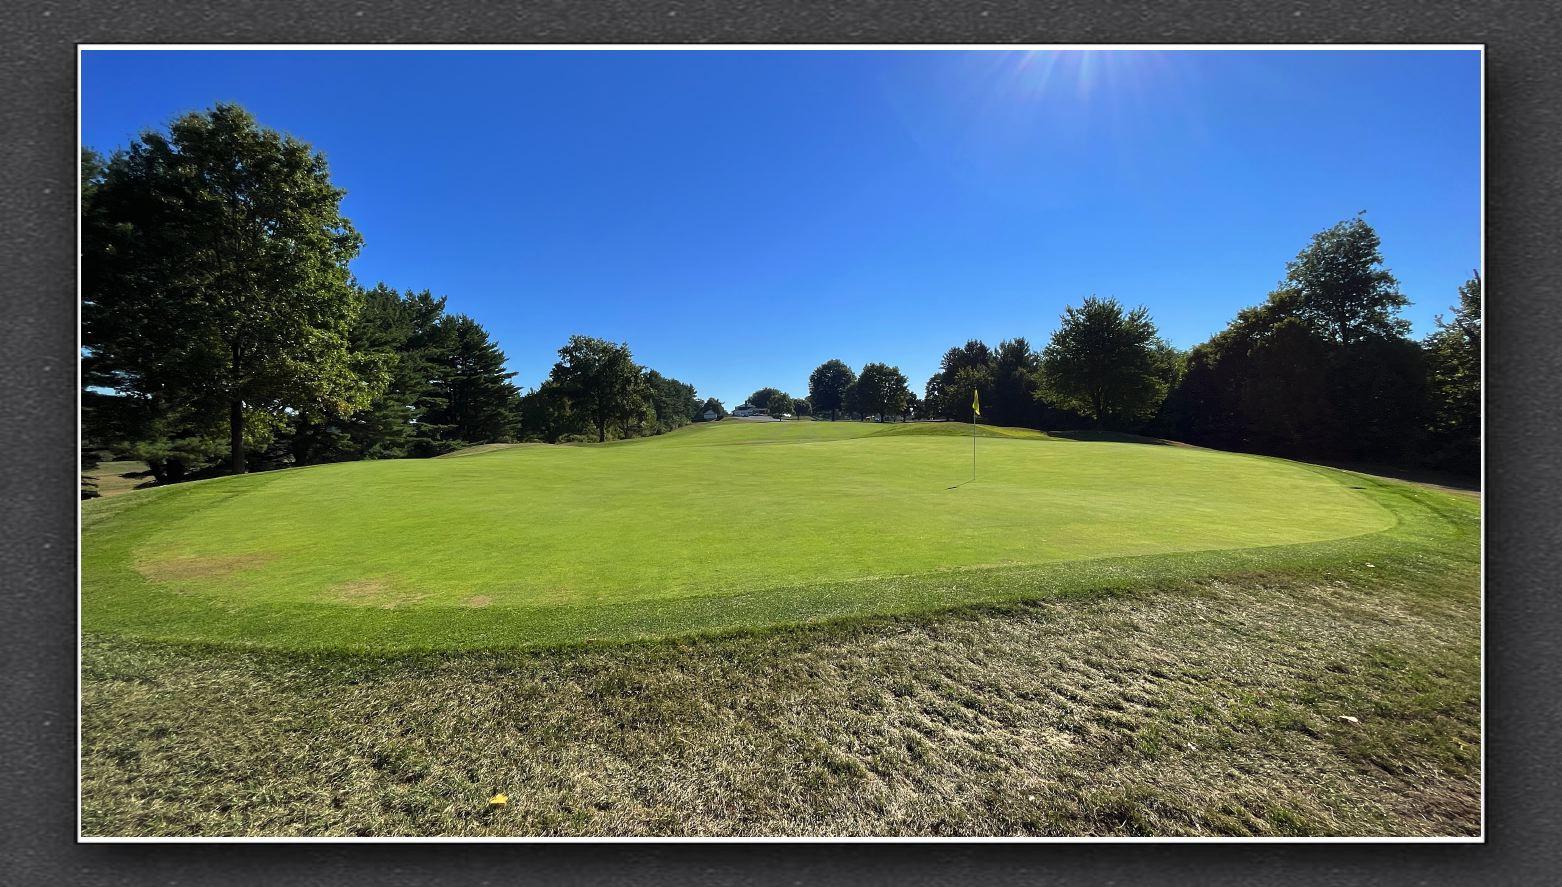
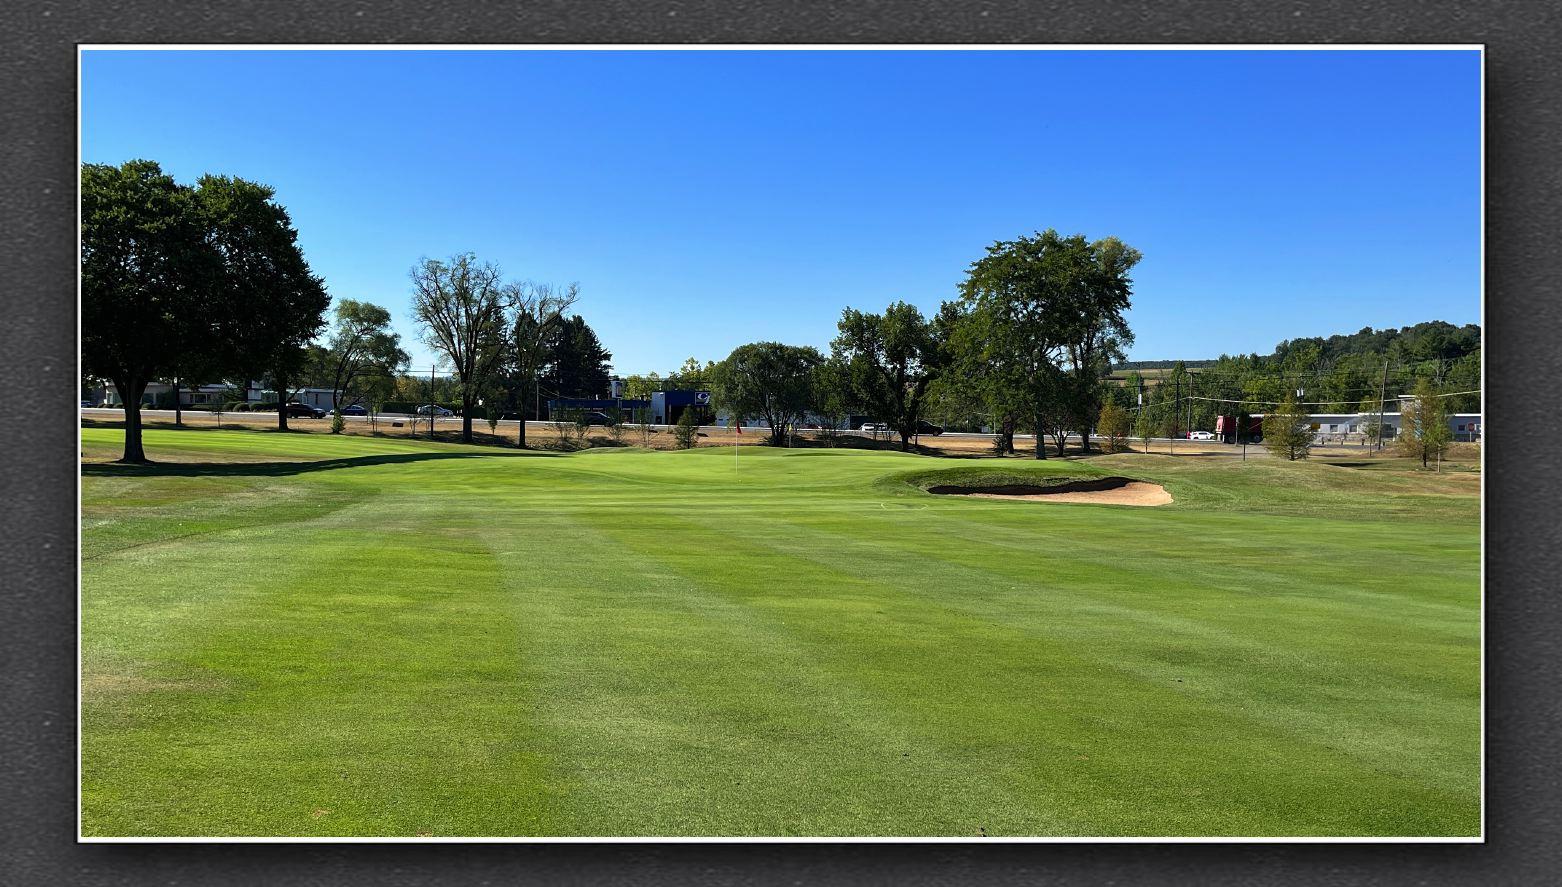
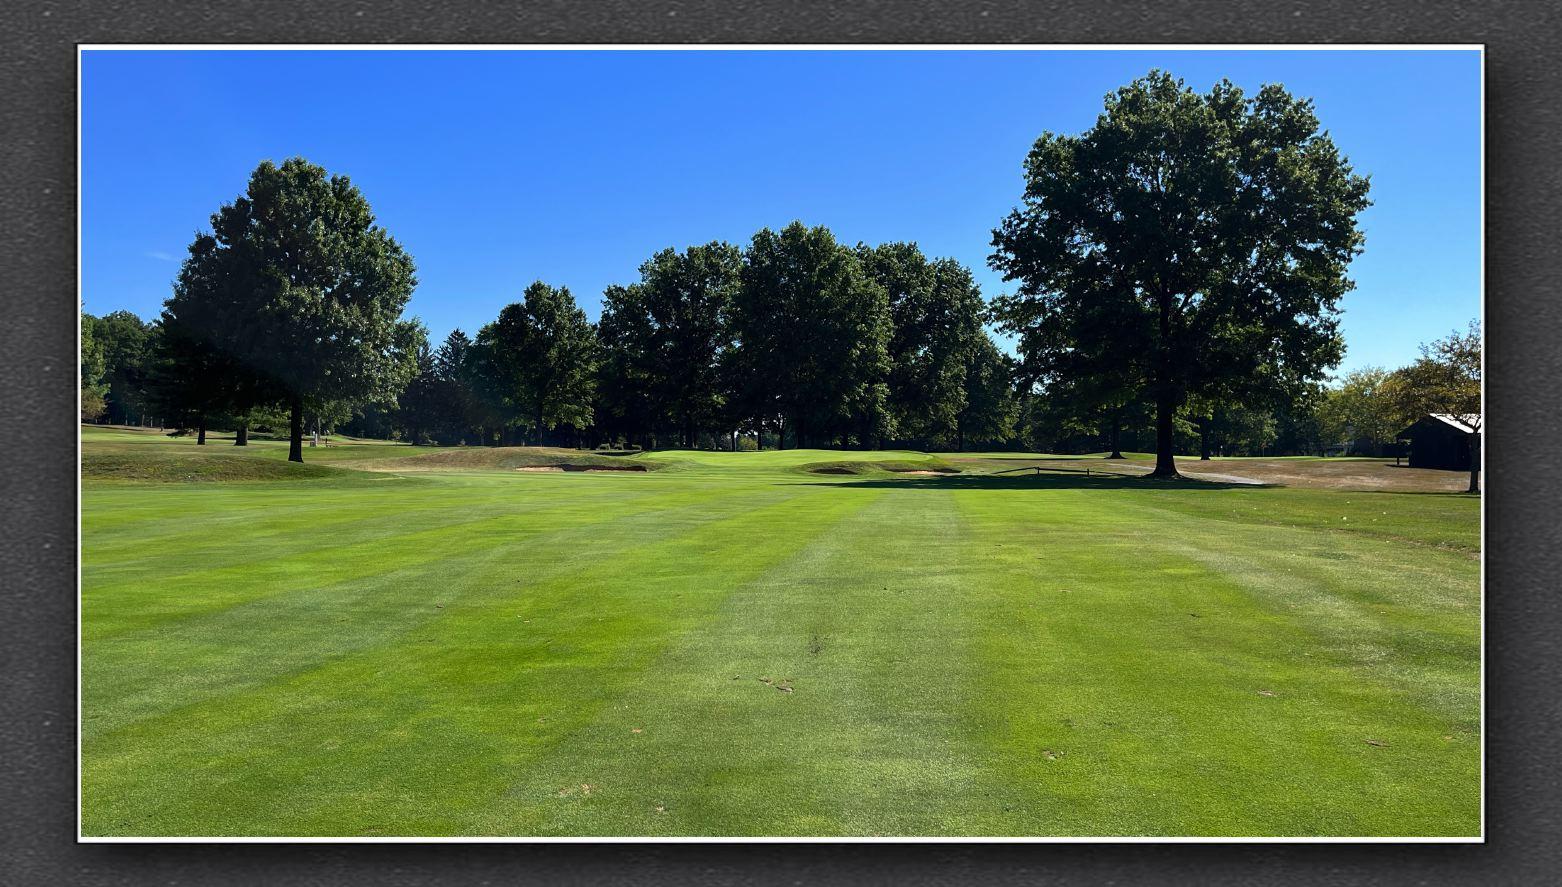
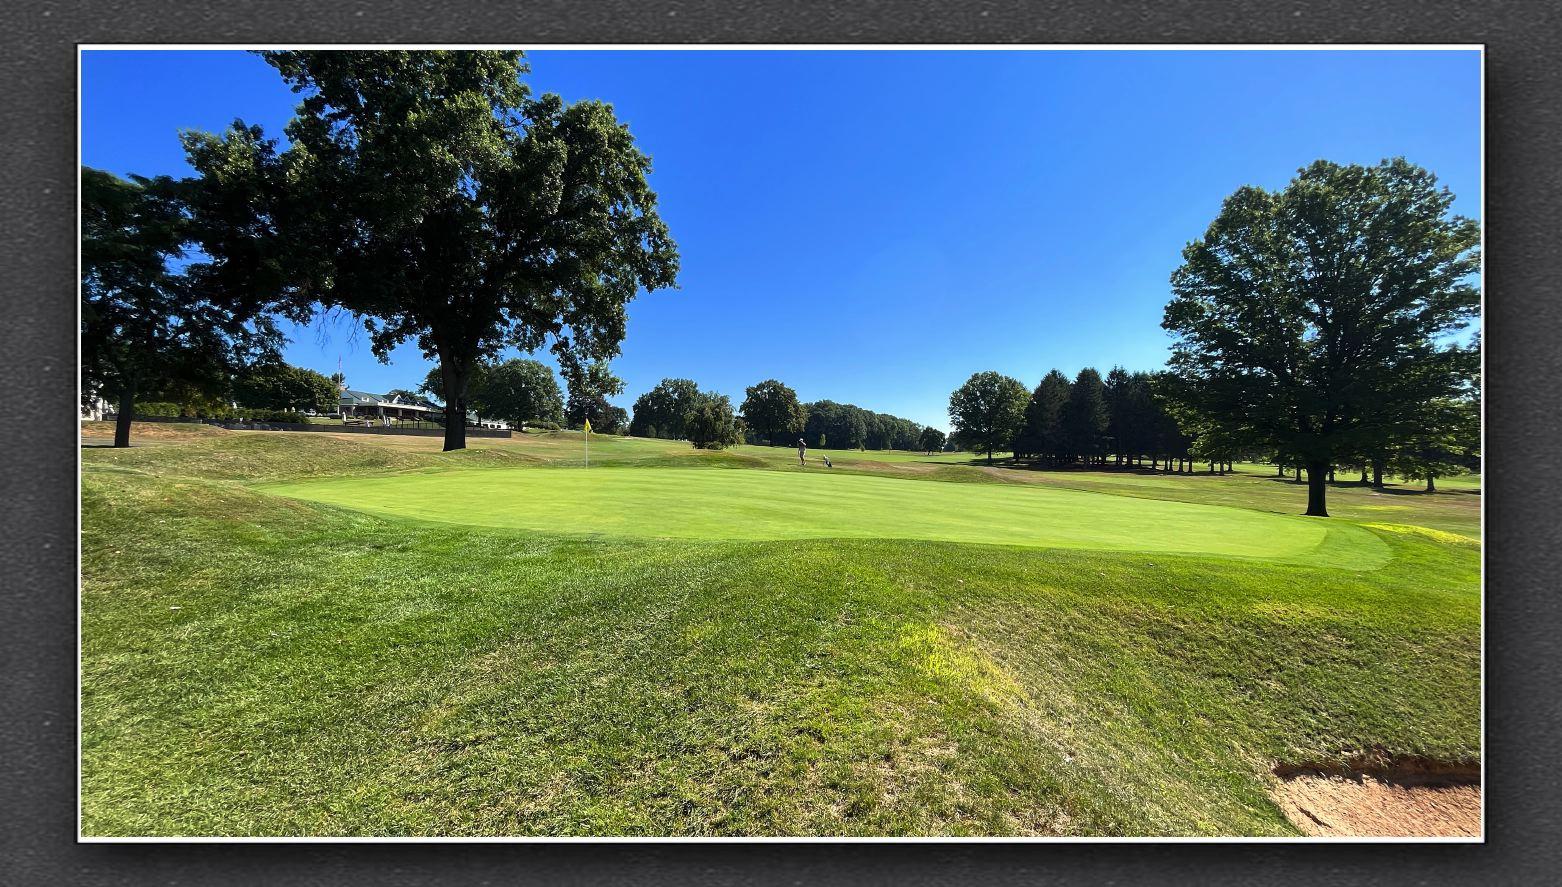
Hole 2Accuracy is key here, so choosing a club that allows for a controlled, straight shot is essential. A long iron or hybrid would be ideal for better golfers to keep the ball in play. The Out of Bounds on the left side makes it even more important to avoid that side of the fairway. The green slopes front to back, and it is crowned, so keeping your approach shot below the hole would be smart to avoid rolling away from the pin. Approach shots that land on the front might roll off the back if you're not careful. |
|
|
|
| Black | White | Yellow | Green | Red/Green |
| 369 | 350 | 323 | 315 | 315 |
| Par | Handicap | ||
|---|---|---|---|
| Men | Ladies | Men | Ladies |
| 4 | 4 | 17 | 9 |
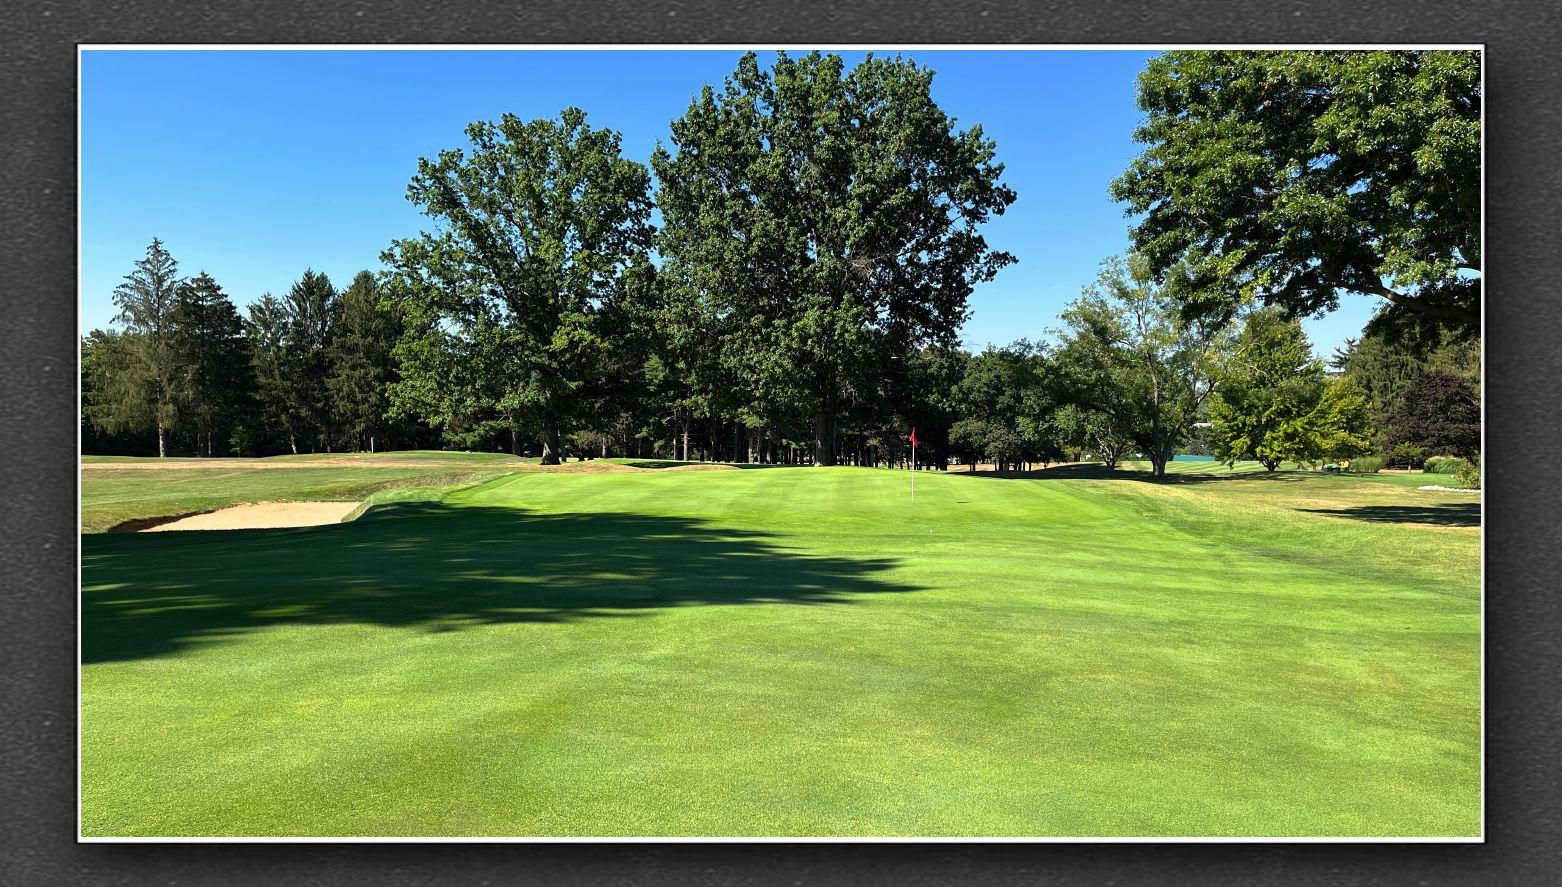
Hole 3If you have the ability to fade the ball, this shot shape is advantageous for this dogleg right. Starting the ball left and allowing it to fade around the corner can position you well for the next shot. Be cautious of the out-of-bounds area near the road on the left side. A long, straight drive could carry into this area, resulting in a penalty stroke. Your second shot depends on where your tee shot lands. If you're in the fairway, you might consider going for the green in two, depending on distance and pin placement. If you're in the rough or have an obstructed view, laying up to a comfortable distance for your third shot may be prudent. Be aware of the greenside bunker that protects certain pin placements. Approach shots that land short or right may find this bunker, making for a challenging up-and-down. |
|
|
|
| Black | White | Yellow | Green | Red/Green |
| 502 | 484 | 478 | 432 | 432 |
| Par | Handicap | ||
|---|---|---|---|
| Men | Ladies | Men | Ladies |
| 5 | 5 | 9 | 3 |
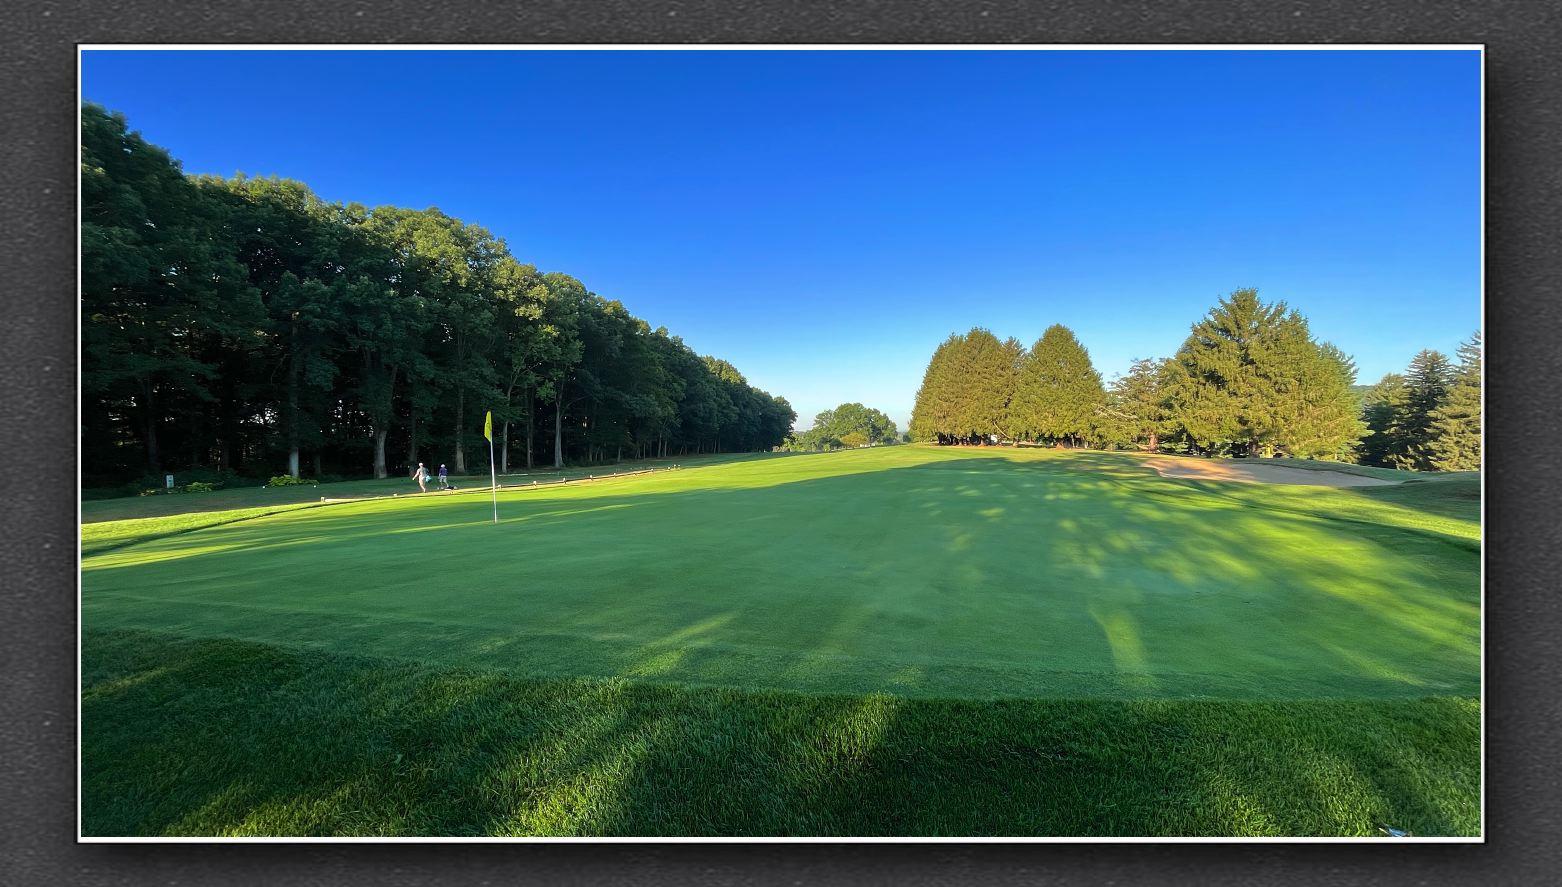
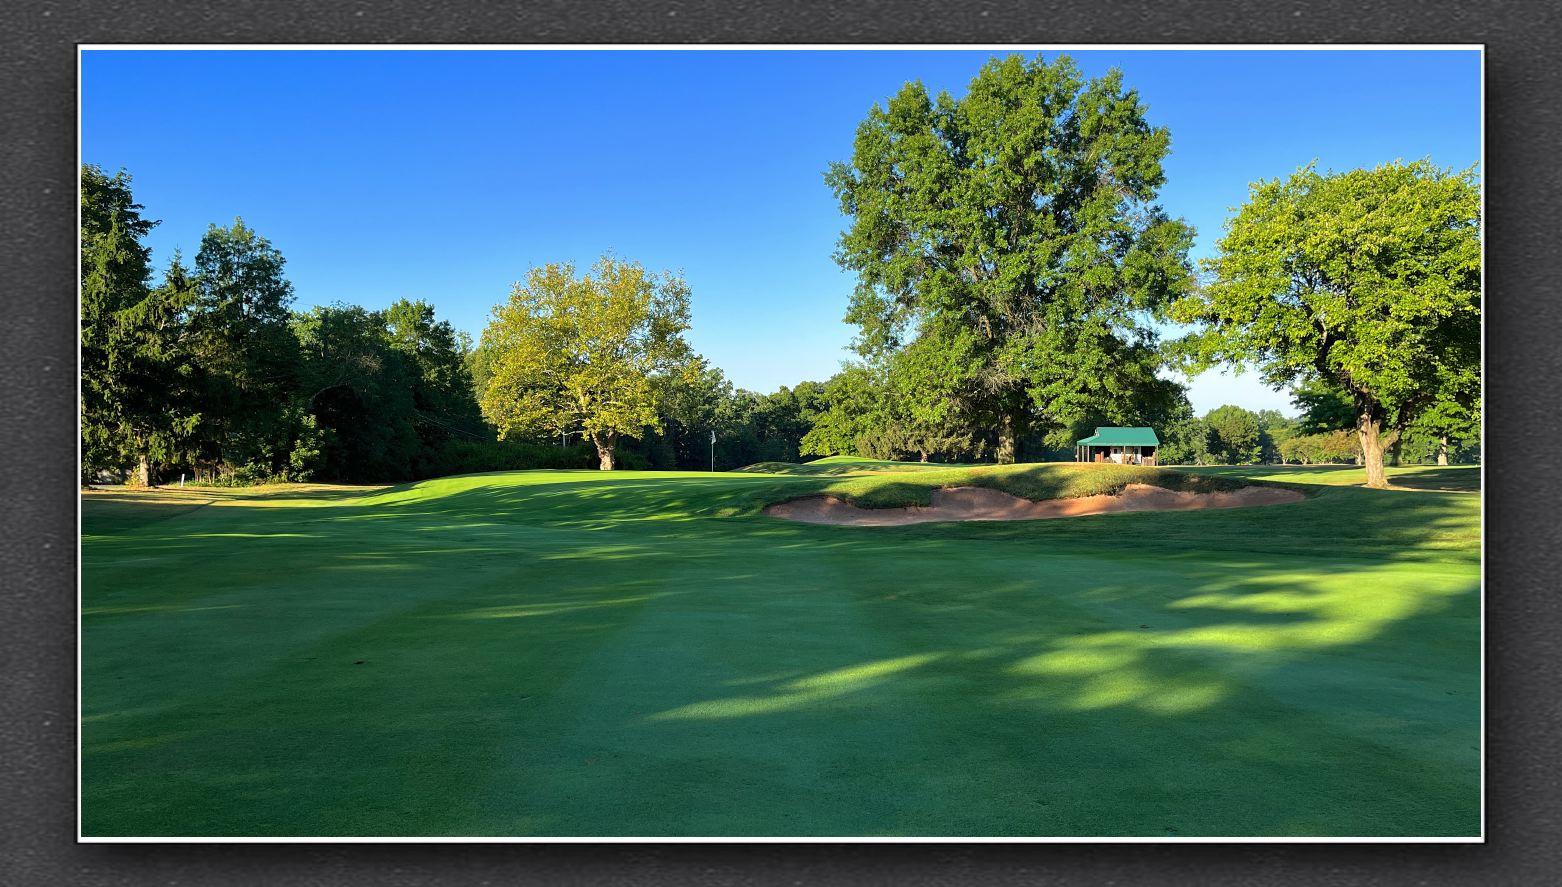
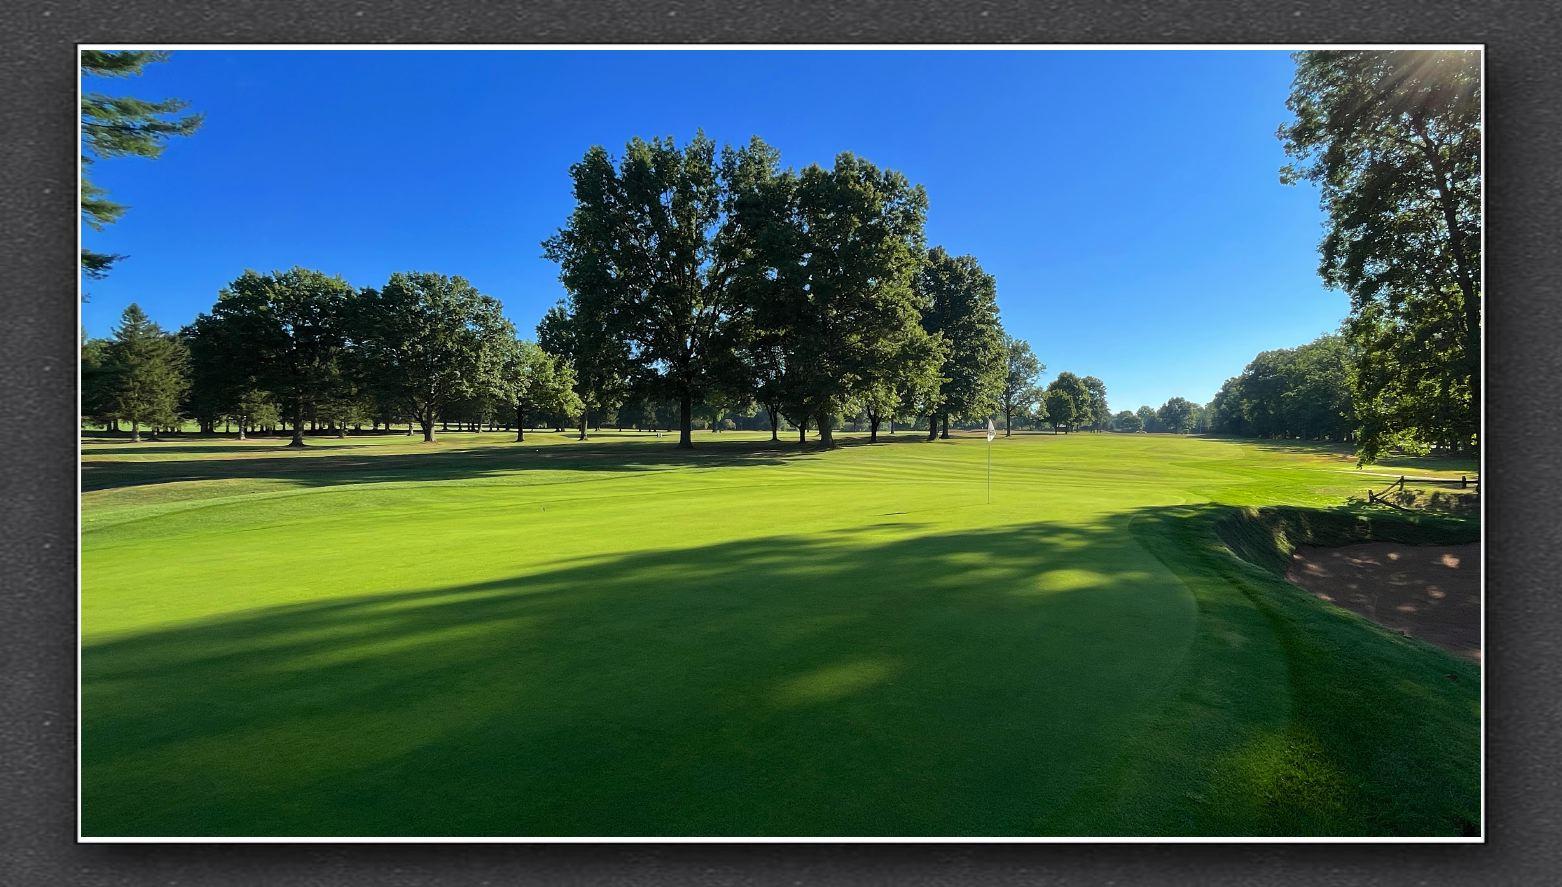
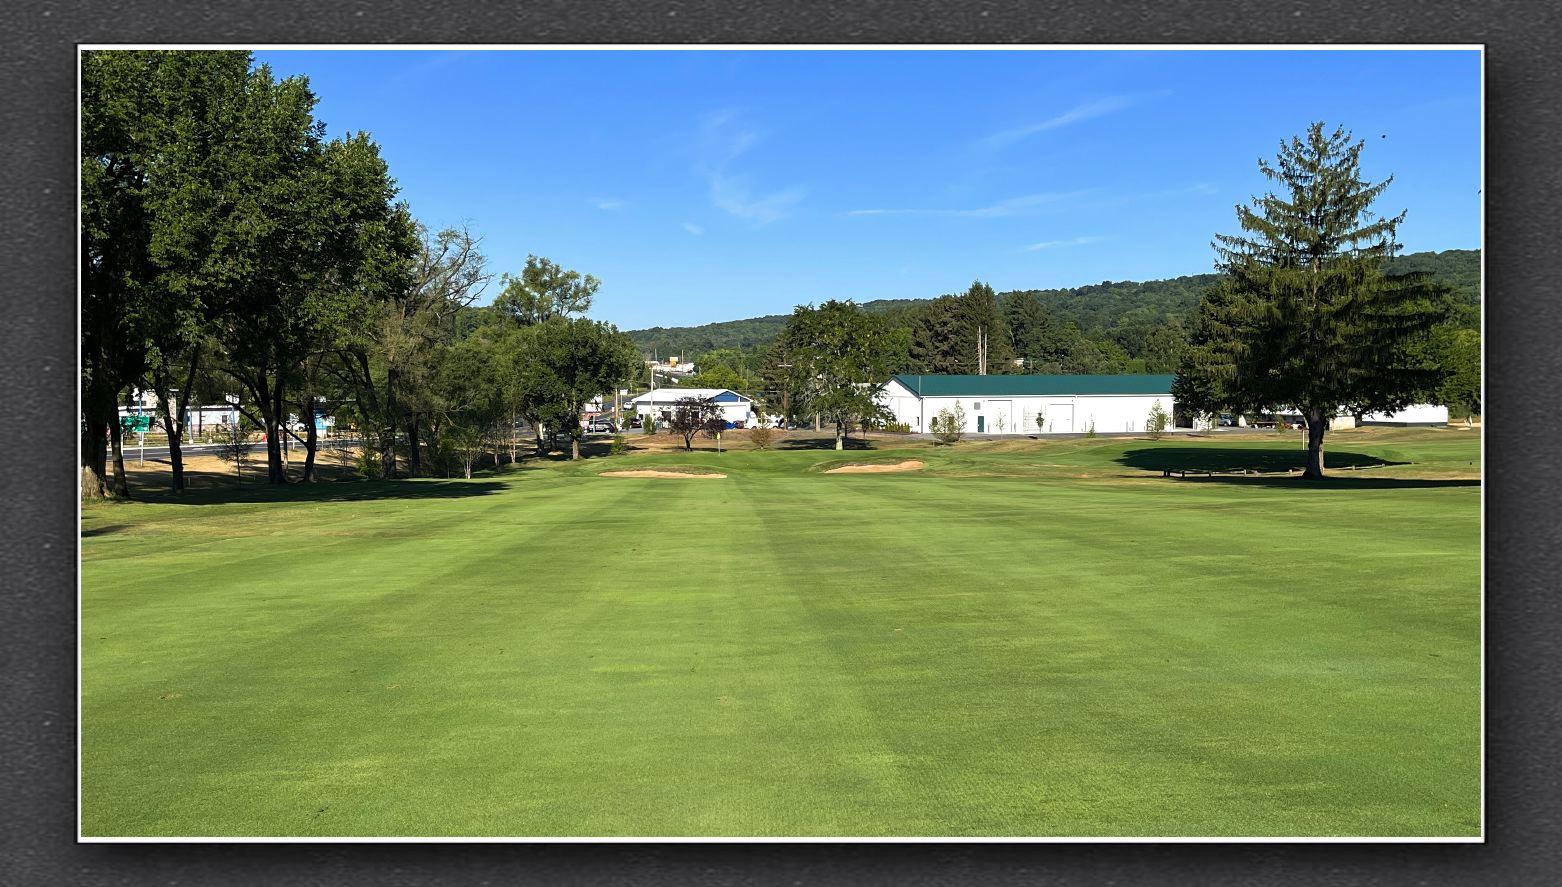
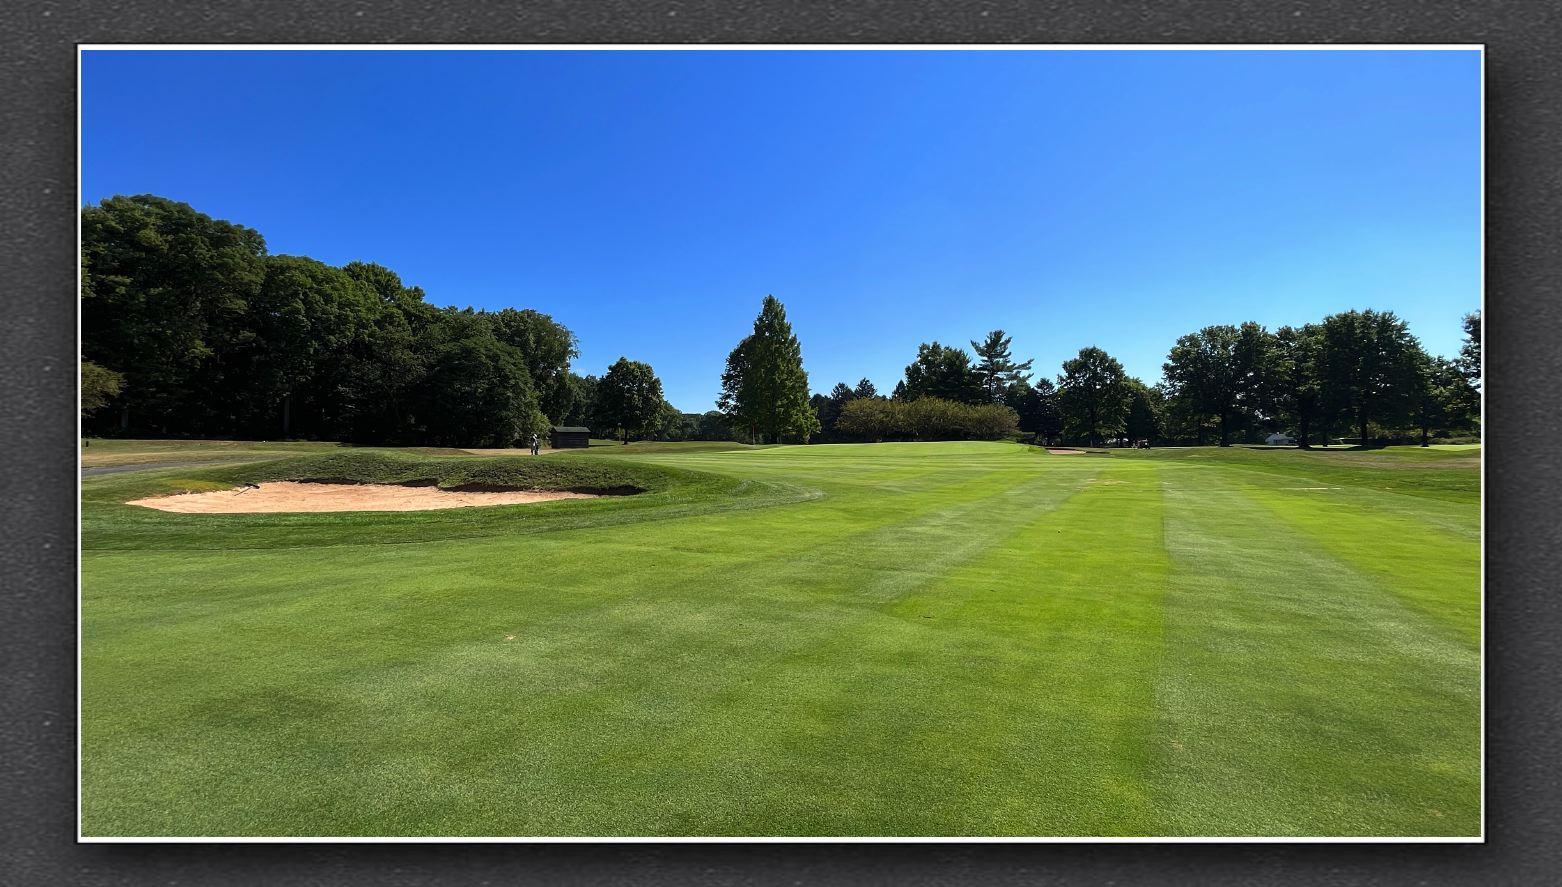
Hole 4The green is heavily guarded by bunkers on both sides in the front. Aim to land your tee shot in the middle of the green to help avoid these bunkers. A shot that lands just short can often roll back twenty yards short of the green. With a two-tiered green, it's crucial to control your shot's distance and trajectory. Landing on the correct tier can make for an easier putt, while missing can lead to a challenging up-and-down. If the pin is on the upper tier, consider aiming for the center of the green to avoid overshooting. |
|
|
|
| Black | White | Yellow | Green | Red/Green |
| 185 | 177 | 145 | 136 | 136 |
| Par | Handicap | ||
|---|---|---|---|
| Men | Ladies | Men | Ladies |
| 3 | 3 | 13 | 13 |
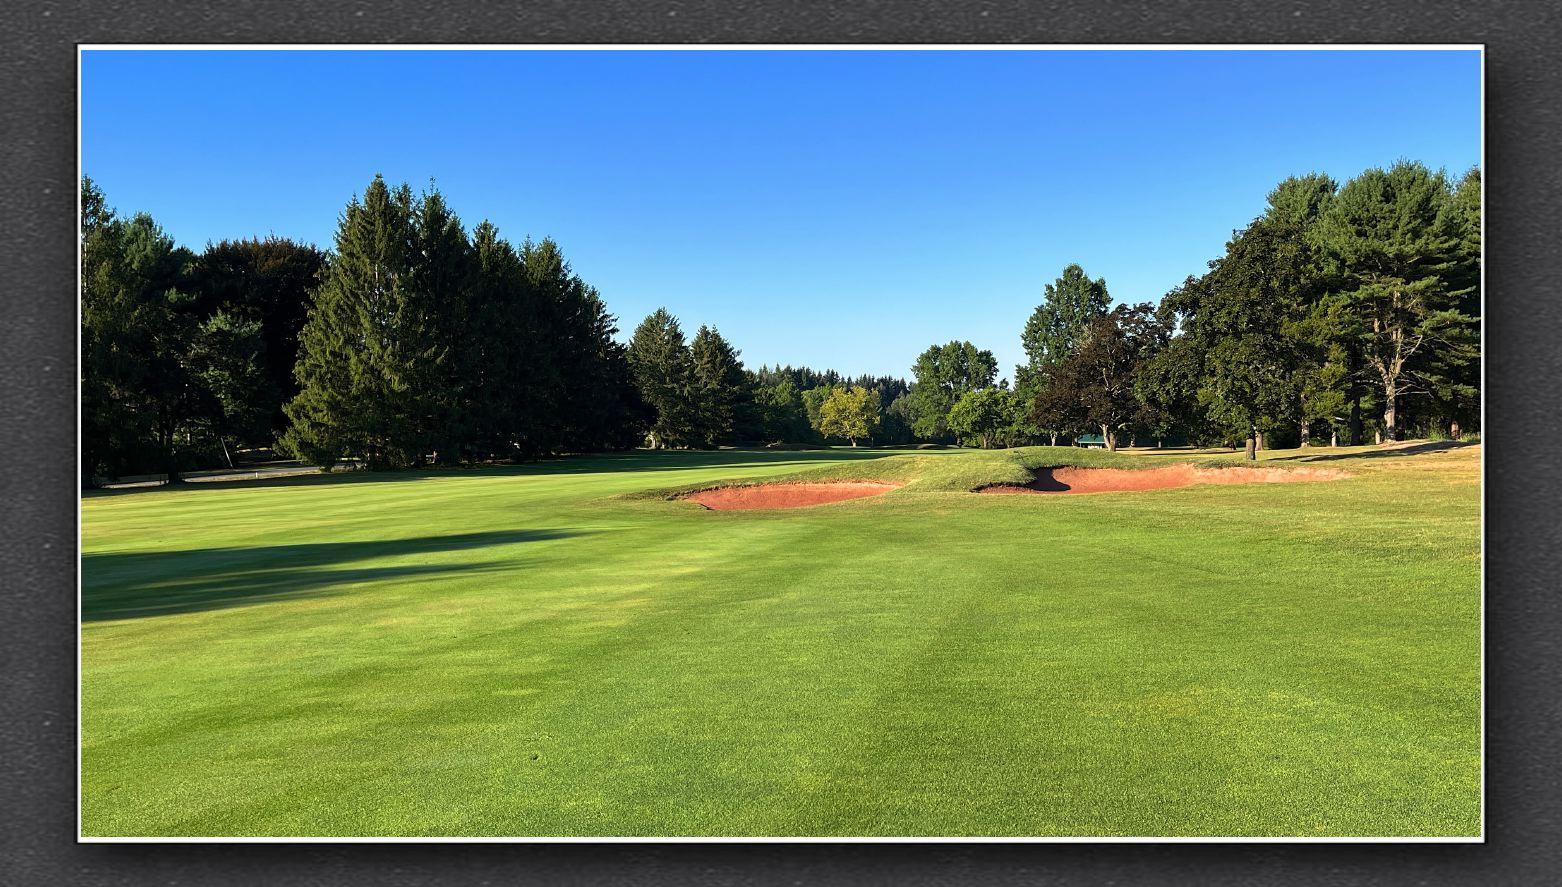
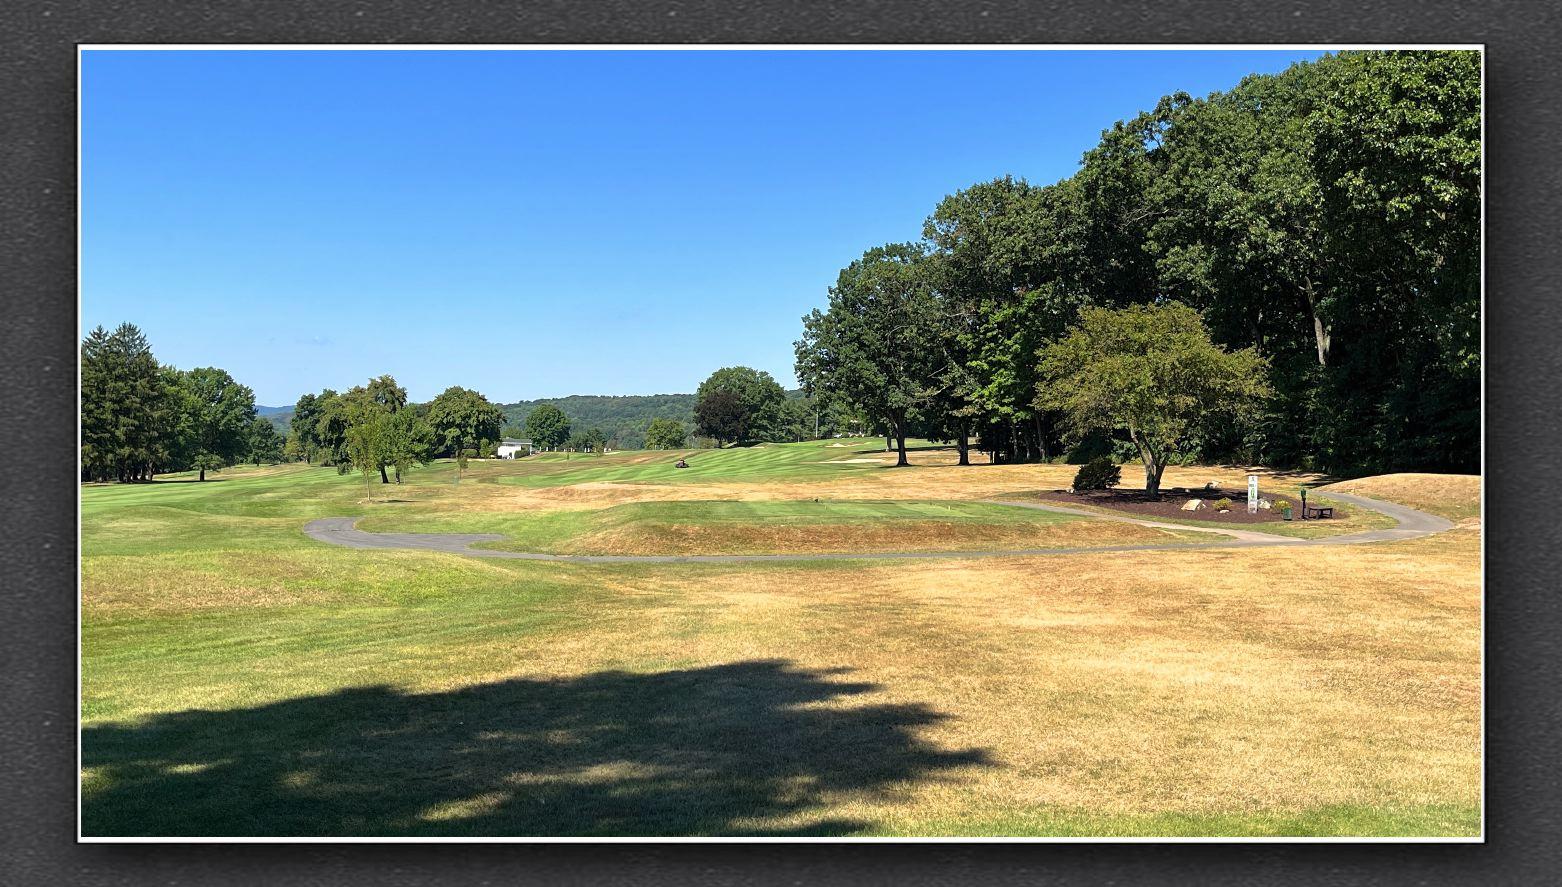
Hole 5The ideal tee shot would be a draw around the dogleg. This will position you in a great spot for your second shot. If you favor a fade or play conservatively, you can aim for a safe area that leaves a longer, less risky approach shot. The green slopes from back to front, so being short of the green or even slightly below the flag is generally a good position. The green side bunkers on both sides add more pressure to sticking the approach. |
|
|
|
| Black | White | Yellow | Green | Red/Green |
| 400 | 385 | 330 | 330 | 285 |
| Par | Handicap | ||
|---|---|---|---|
| Men | Ladies | Men | Ladies |
| 4 | 4 | 11 | 15 |
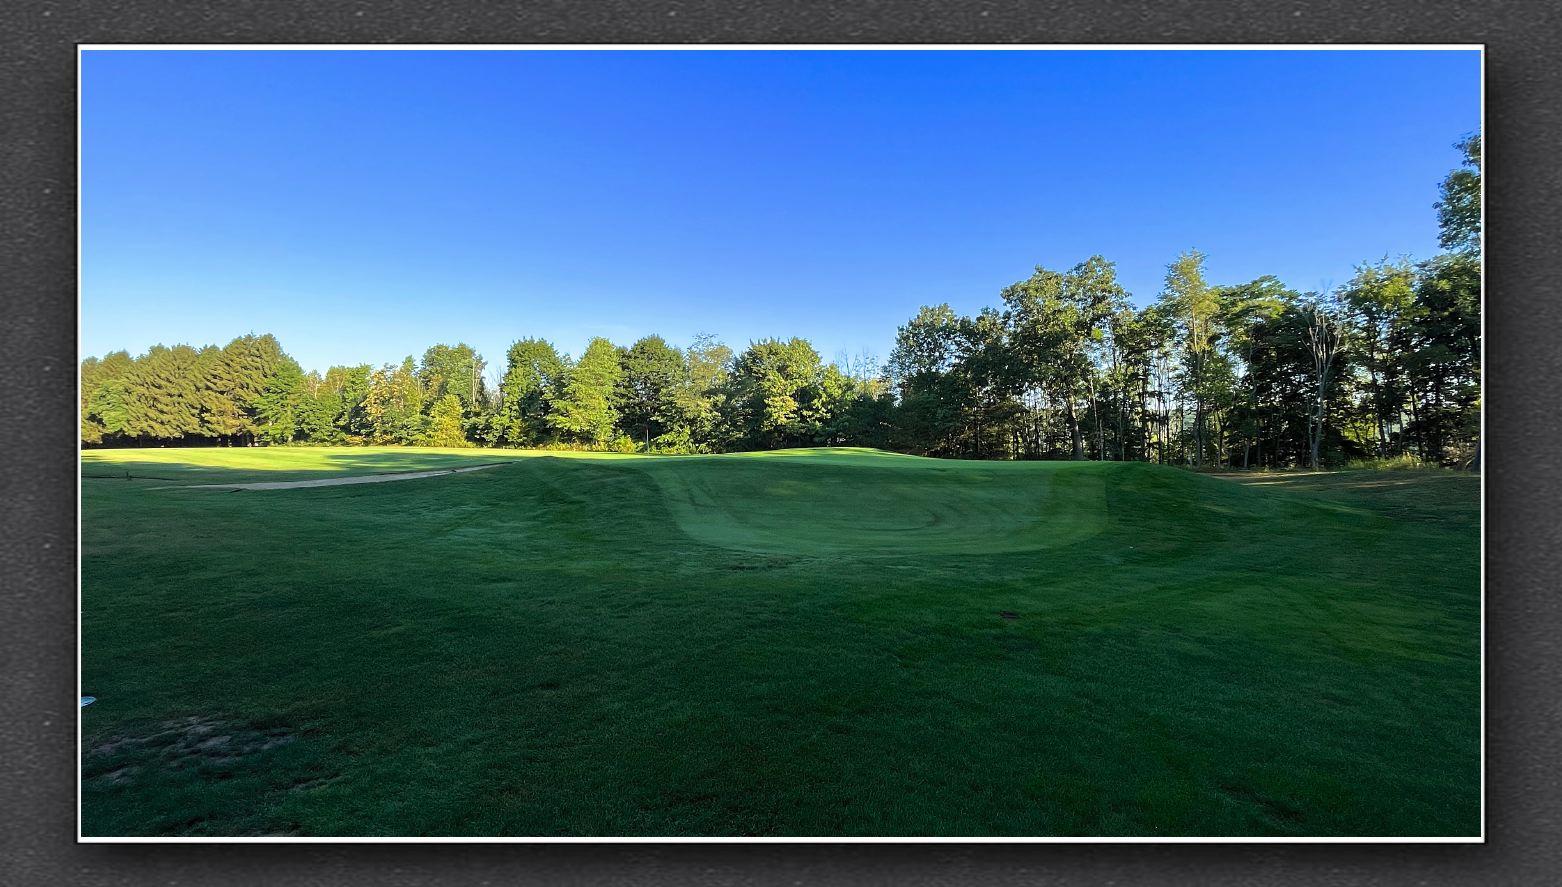
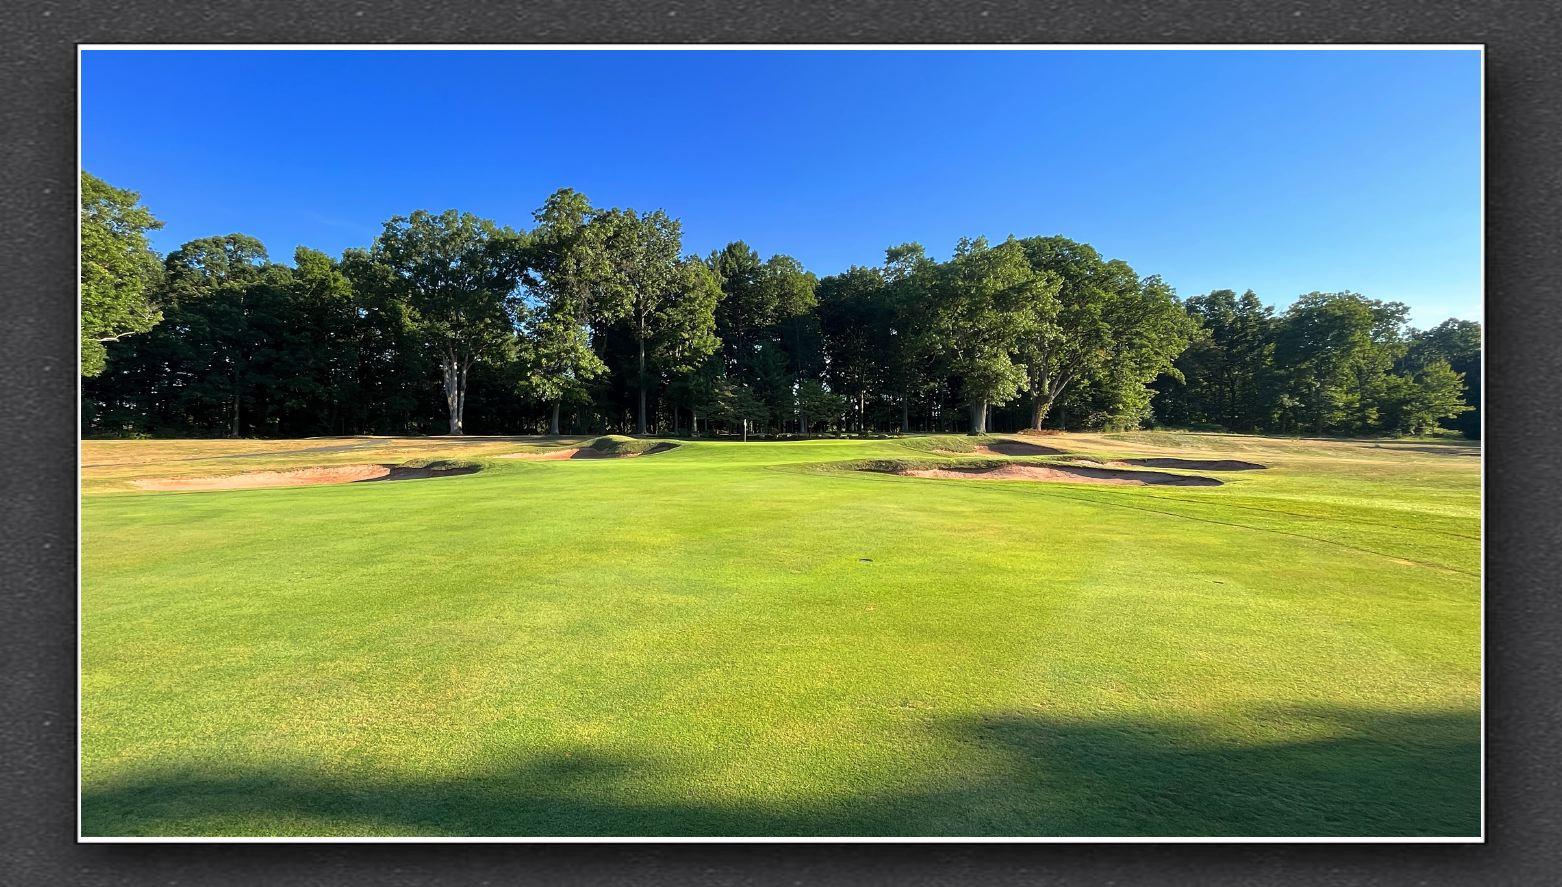
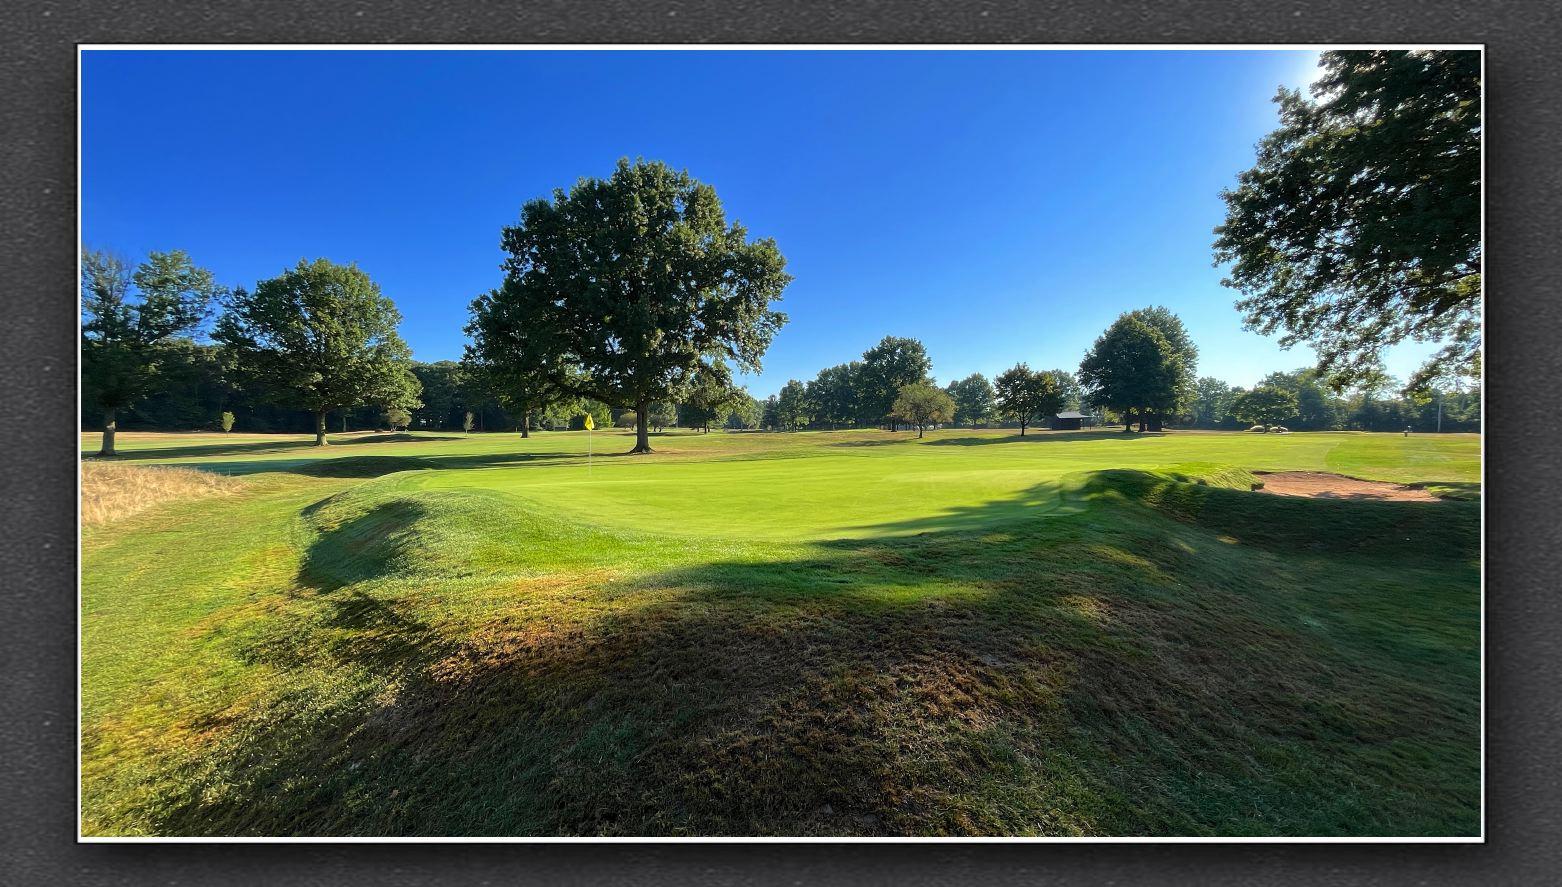
Hole 6The key here is the pin's location. If the pin is tucked in a tough spot, avoiding certain areas becomes more crucial. Typically, you’ll want to avoid being short of the green (since it could leave you in a tough up-and-down scenario), and make sure you don’t go long, where the fescue mounds at the back will make it difficult to recover. The right distance control will be key here. With bunkers protecting both sides, it’s important to have an accurate, straight tee shot that avoids them. Being short and straight on this hole is not a bad play. |
|
|
|
| Black | White | Yellow | Green | Red/Green |
| 219 | 198 | 183 | 174 | 113 |
| Par | Handicap | ||
|---|---|---|---|
| Men | Ladies | Men | Ladies |
| 3 | 3 | 15 | 17 |
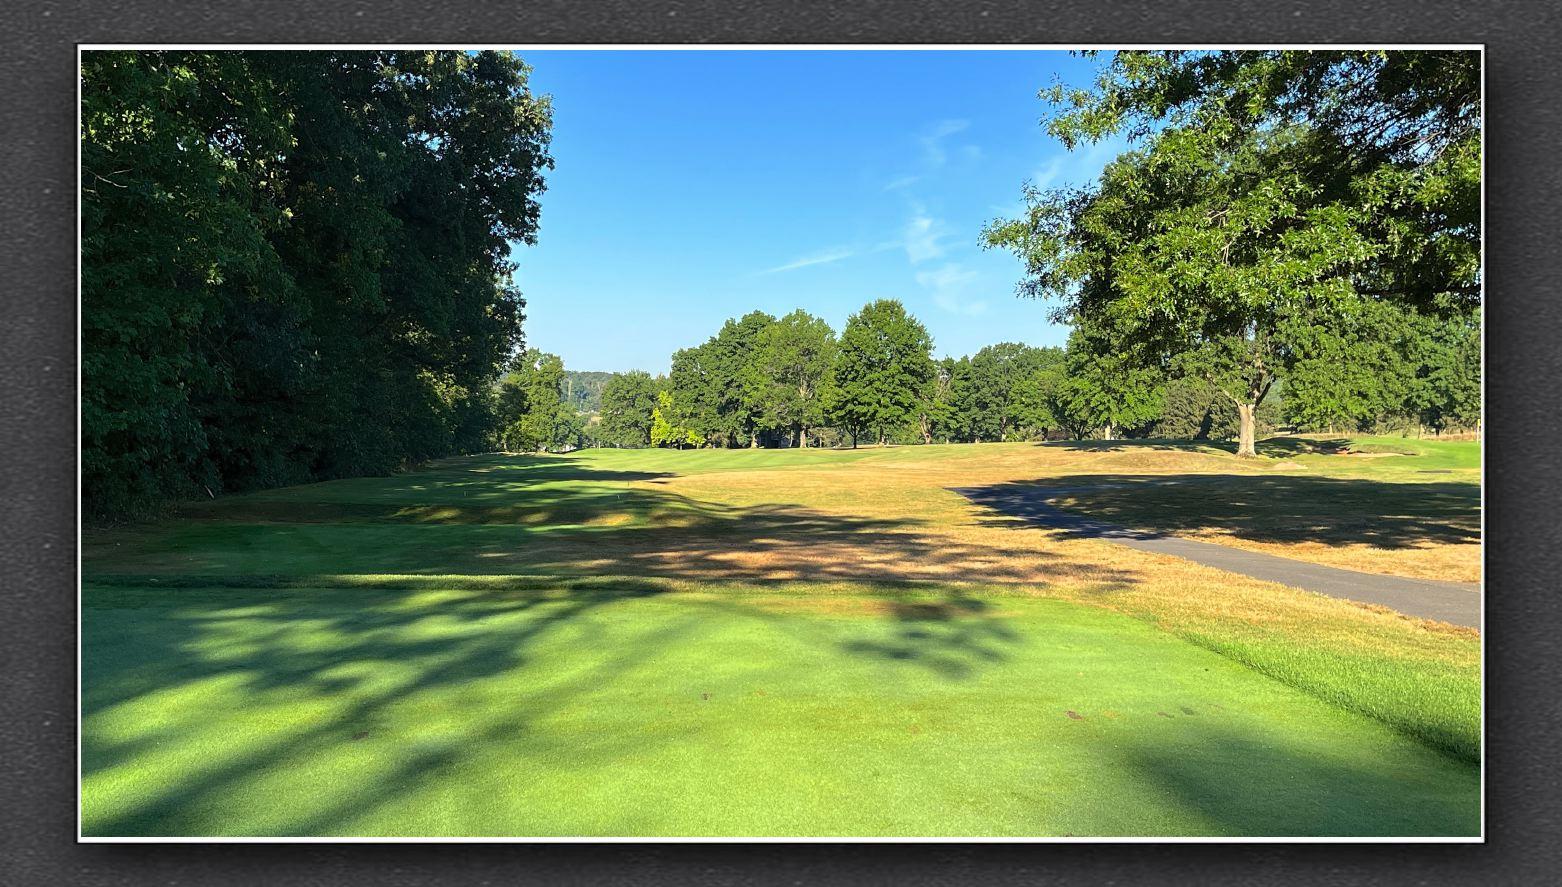
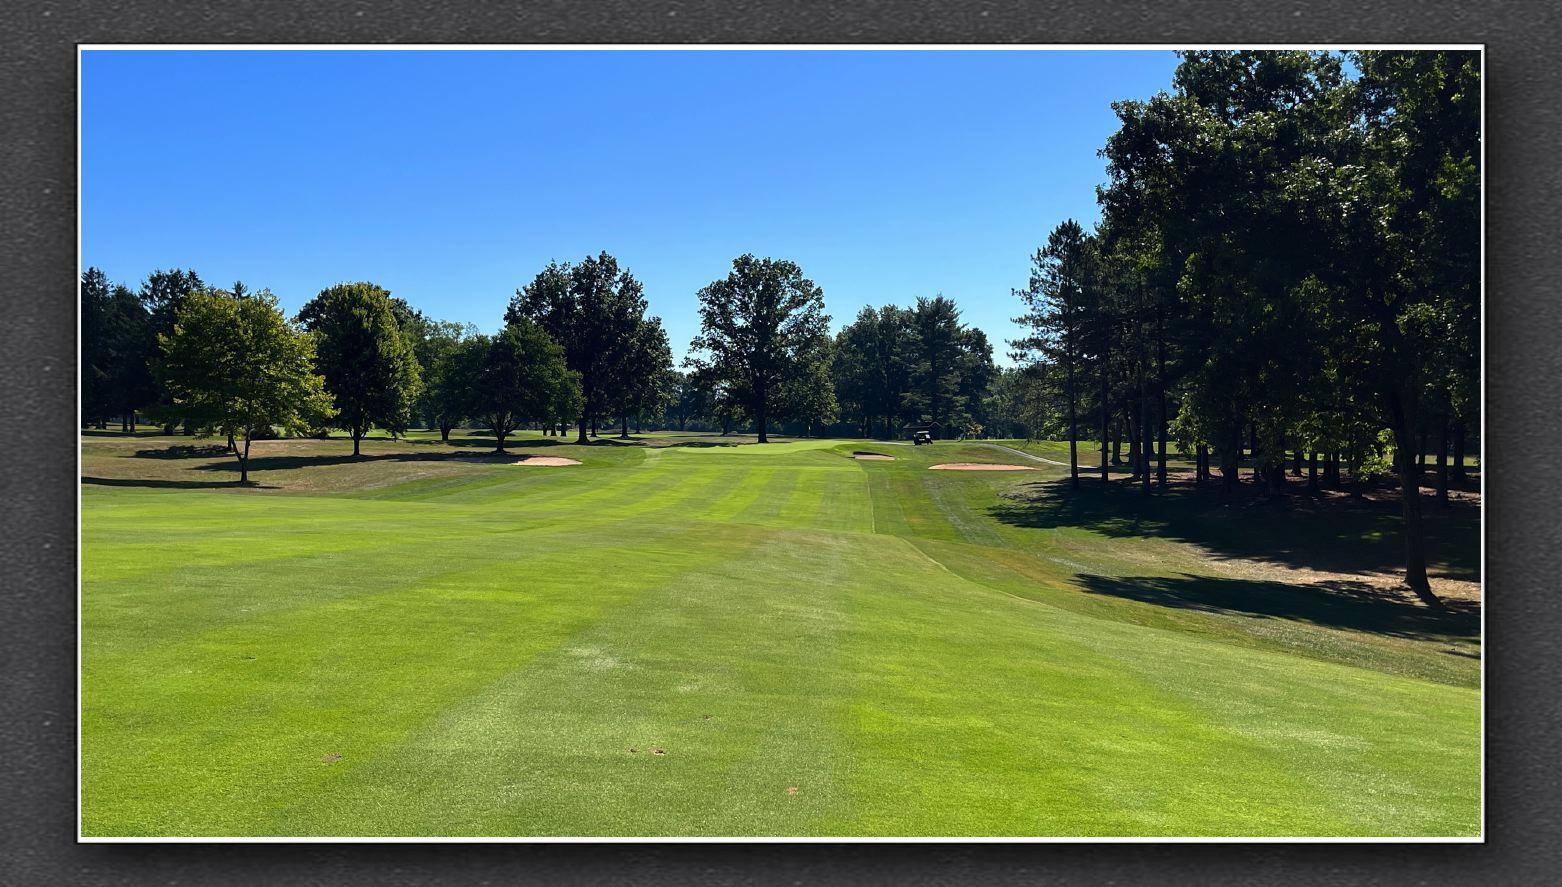
Hole 7Since the fairway slopes right to left, you’ll need to account for that when choosing your target line. You don’t want to over correct and end up in the right-side rough, but you definitely want to avoid the out-of-bounds area on the left. With a deep bunker guarding the left side of the green, you’ll want to be cautious not to pull your approach shot. Ideally, aim for the center or right side of the green to avoid the sand and leave yourself an easier up-and-down if you're off the green. The oak trees lining both sides of the hole can also influence your approach shot if you're off the fairway. If you're in the rough or behind a tree, you may need to play a low punch shot or shape it around the tree, so keeping it on the fairway off the tee is crucial. |
|
|
|
| Black | White | Yellow | Green | Red/Green |
| 436 | 395 | 353 | 340 | 292 |
| Par | Handicap | ||
|---|---|---|---|
| Men | Ladies | Men | Ladies |
| 4 | 4 | 3 | 11 |
Hole 8With the out-of-bounds along the left, you’ll definitely want to aim more toward the right side of the fairway, but not too far right that you risk being in the rough. If you’ve hit a long drive and are feeling bold, you could go for a big second shot. A long approach could set you up with a downhill wedge into the green, which is an ideal position to attack the flag. The key here is not to over hit and end up in trouble. Make sure to gauge the distance carefully and take enough club to reach the green while avoiding the bunkers in front. |
|
|
|
| Black | White | Yellow | Green | Red/Green |
| 568 | 549 | 479 | 479 | 472 |
| Par | Handicap | ||
|---|---|---|---|
| Men | Ladies | Men | Ladies |
| 5 | 5 | 1 | 1 |
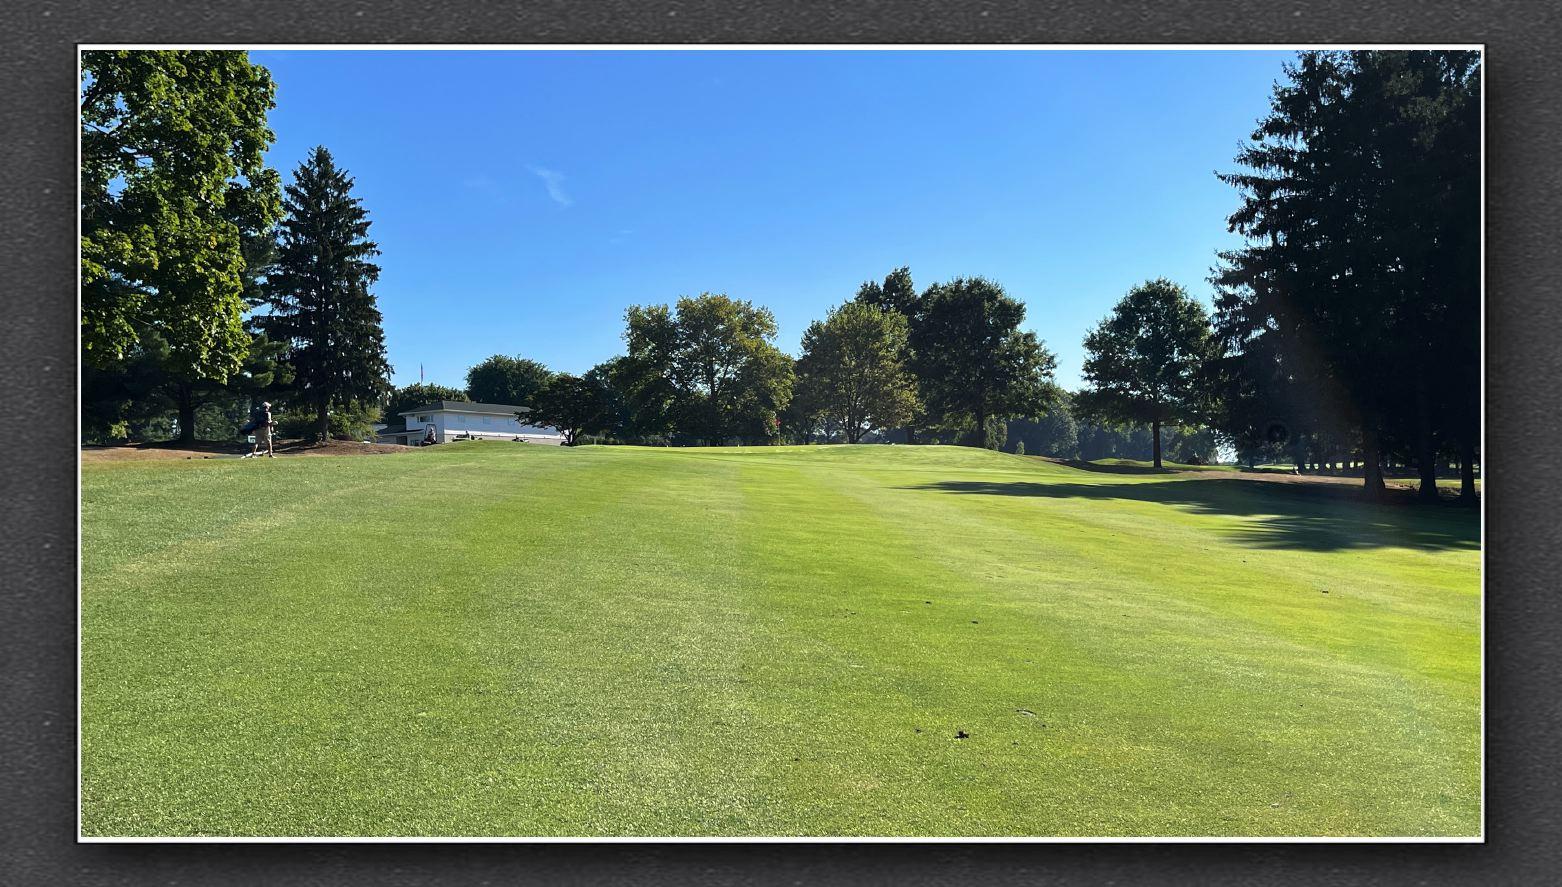
Hole 9The fairway slopes left to right, so you’ll need to account for that when aiming your tee shot. Ideally, aim to the left side of the fairway, but not too far left, to avoid getting caught up in rough or trees. A great aiming point will be the American Flag at the clubhouse. Avoid the high fescue grass to the right of the fairway, which you can’t see from the green. The two-tiered green adds an interesting challenge. Depending on where the pin is placed, the second tier could be tricky, especially if you're coming in from a less-than-ideal angle. If the pin is on the front, be wary of the false front. Shots short of the green will generally roll thirty yards back down the fairway and into the rough. |
|
|
|
| Black | White | Yellow | Green | Red/Green |
| 361 | 355 | 310 | 310 | 310 |
| Par | Handicap | ||
|---|---|---|---|
| Men | Ladies | Men | Ladies |
| 4 | 4 | 7 | 5 |
Hole 10The out-of-bounds on the right side requires you to aim left, but not too far left or you risk getting into rough or even trees. A controlled tee shot that favors the left side of the fairway would keep you in play and set up a good approach shot. The green is well protected by bunkers on the left and a steep slope over the green. The green slopes from front to back, so play your approach shot short of the pin so your ball releases towards the flag. |
|

|
|
| Black | White | Yellow | Green | Red/Green |
| 398 | 385 | 363 | 354 | 301 |
| Par | Handicap | ||
|---|---|---|---|
| Men | Ladies | Men | Ladies |
| 4 | 4 | 4 | 6 |
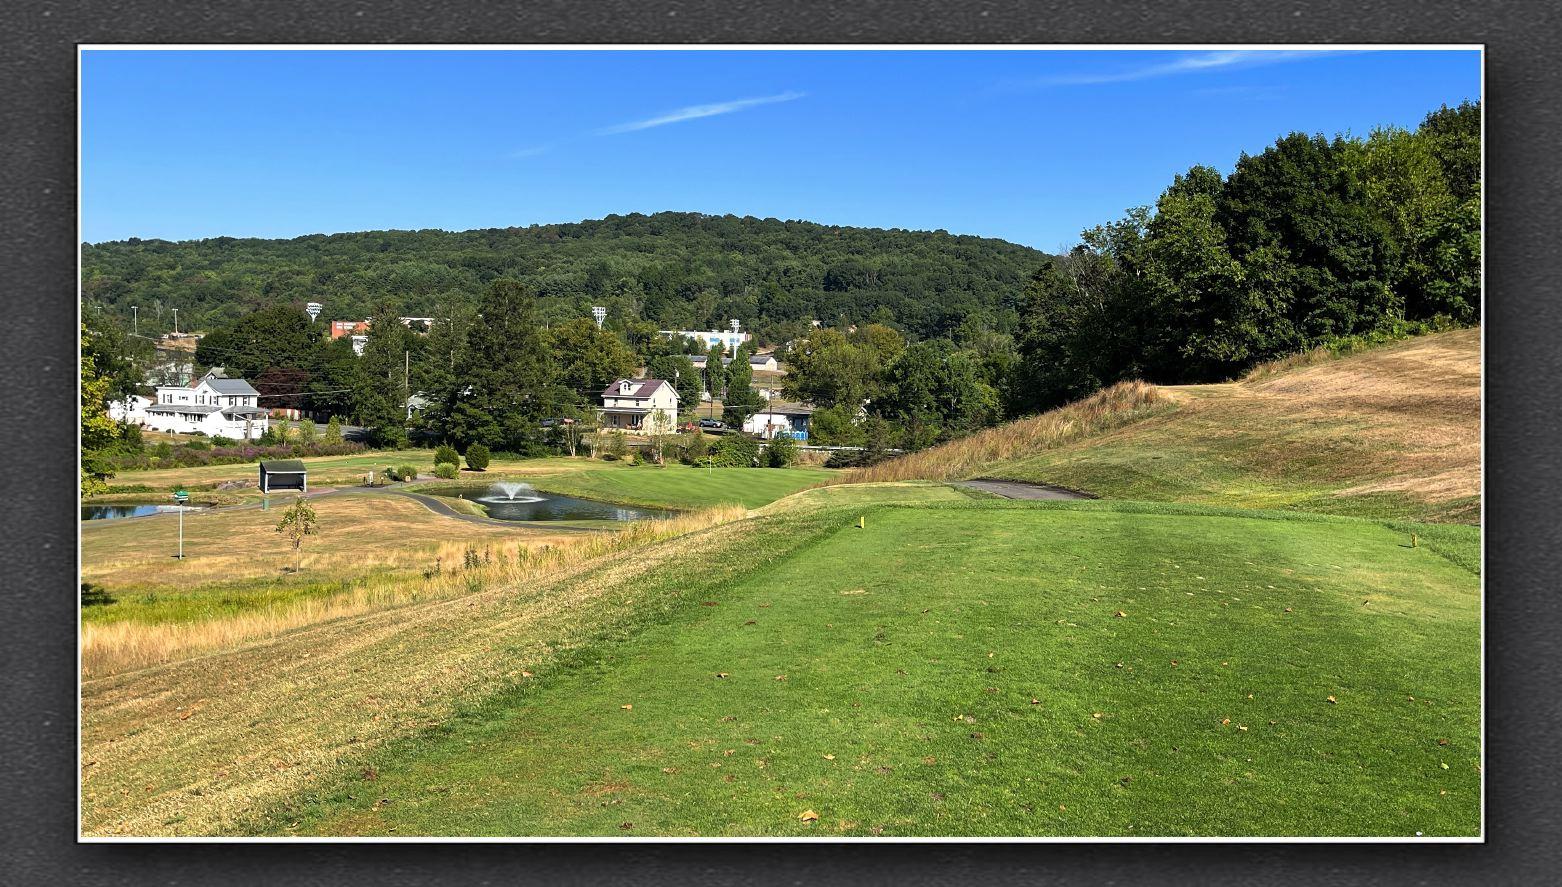
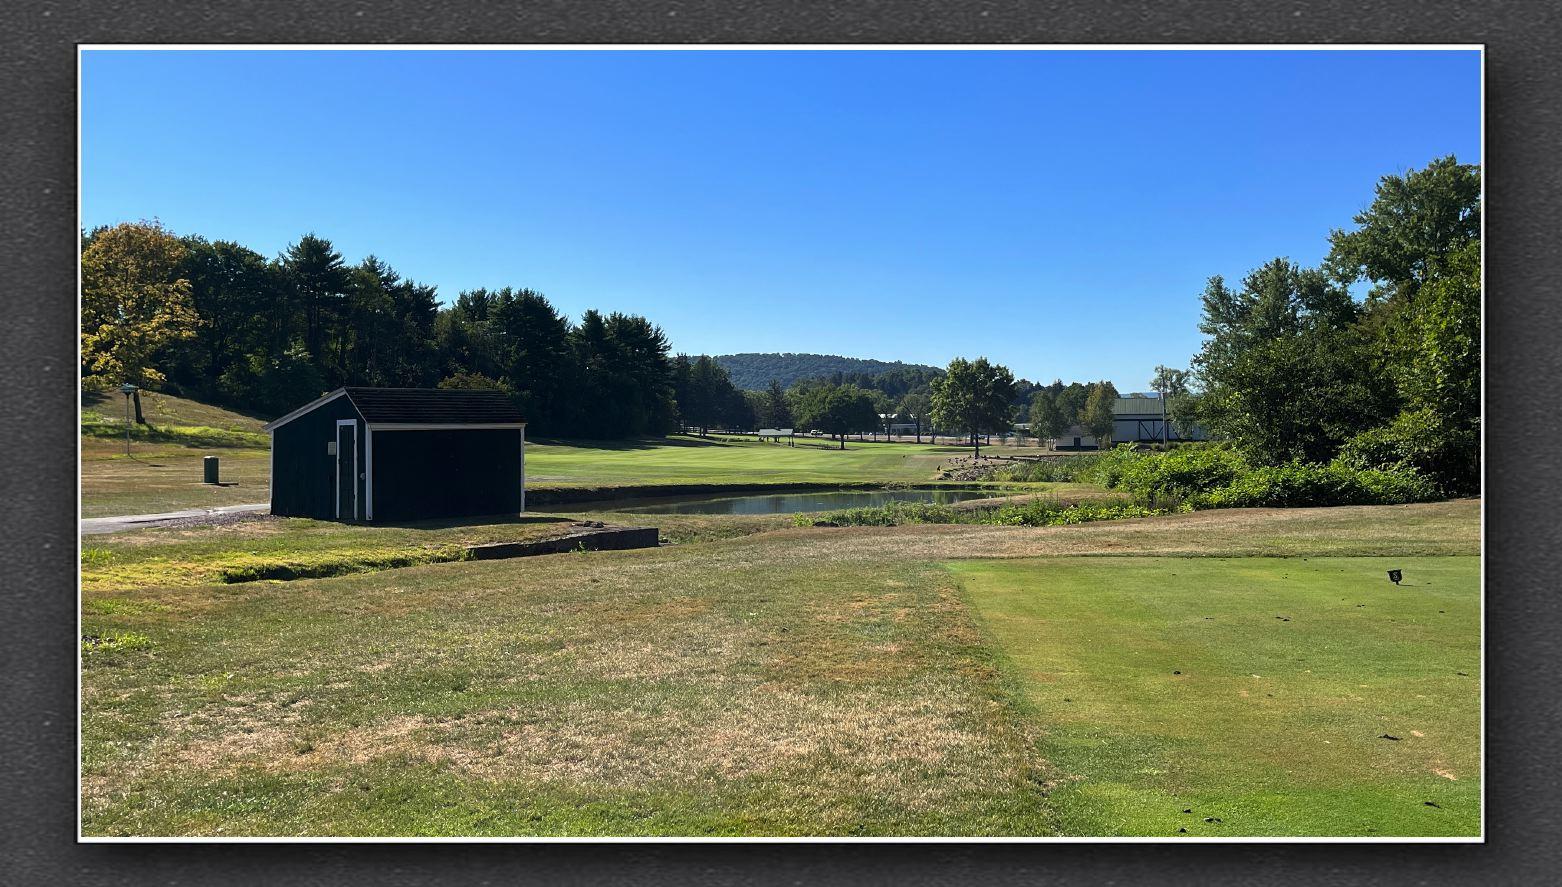
Hole 11Our Signature Hole: Since it's downhill, your shot will likely play shorter than the yardage on the scorecard. Be sure to factor in the drop when choosing your club and consider going one club less from what you'd normally use for a flat hole. The pond on the left, the stream along the back, and the bunker on the right all make for a tricky decision. Aiming for the center of the green is likely your safest bet. Hole #11 at Schuylkill Country Club was recognized as honorable mention by the Golf Association of Philadelphia’s "Ultimate 18 Golf Holes |
|
|
|
| Black | White | Yellow | Green | Red/Green |
| 177 | 160 | 151 | 120 | 120 |
| Par | Handicap | ||
|---|---|---|---|
| Men | Ladies | Men | Ladies |
| 3 | 3 | 18 | 18 |
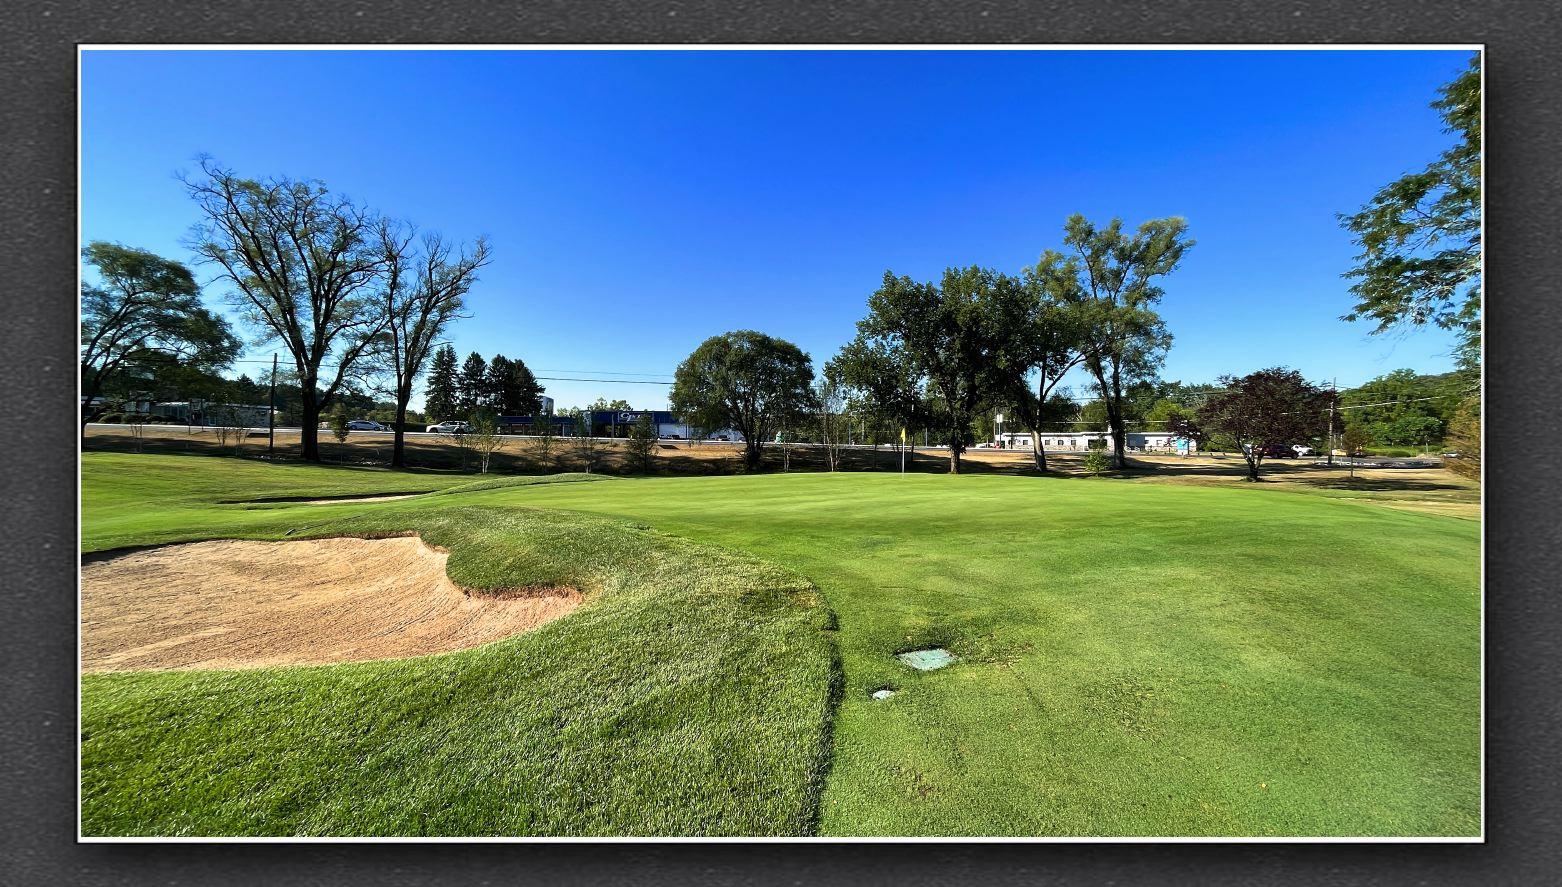
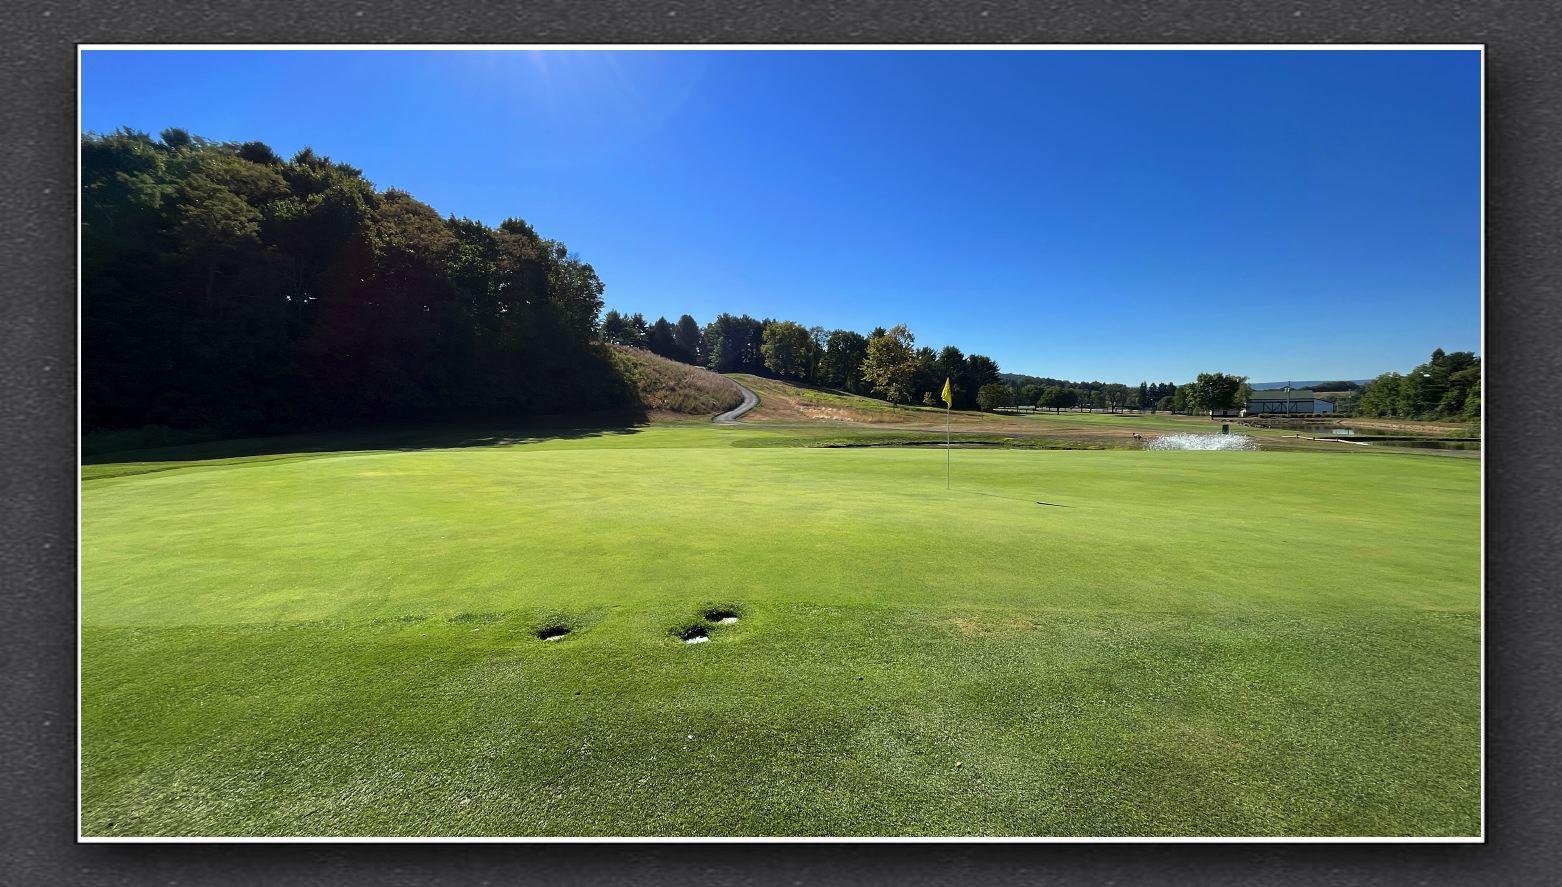
Hole 12Crossing the Borden Bridge to the tee leaves you a picturesque Tee Shot to this short demanding hole. This hole offers a good opportunity to score well, but the water and shelf-style green demand precision. Playing it smart, aiming for the middle of the green, and avoiding the water will give you the best chance for a par or birdie. Don’t go long with your approach shot or you will have a very difficult time getting it up and down. |
|
|
|
| Black | White | Yellow | Green | Red/Green |
| 352 | 338 | 320 | 318 | 233 |
| Par | Handicap | ||
|---|---|---|---|
| Men | Ladies | Men | Ladies |
| 4 | 4 | 14 | 14 |
Hole 13The fairway slopes right and you want to position your tee shot carefully to give yourself the best angle for your approach. While it might seem tempting to aim far left to be safe, you’ll want to avoid putting yourself too far from the ideal line for the second shot. The two-tiered green, arguably the toughest green on the course, adds a tricky element to your approach. The green slopes to the front-right, so hitting the center of the green is your safest bet. If the pin is on the back-left tier, you might be able to aim for the upper part of the green and let your shot roll toward it but be mindful of overshooting as the drop-off behind the green could leave you with a difficult recovery. |
|
|
|
| Black | White | Yellow | Green | Red/Green |
| 410 | 402 | 364 | 364 | 266 |
| Par | Handicap | ||
|---|---|---|---|
| Men | Ladies | Men | Ladies |
| 4 | 4 | 2 | 8 |
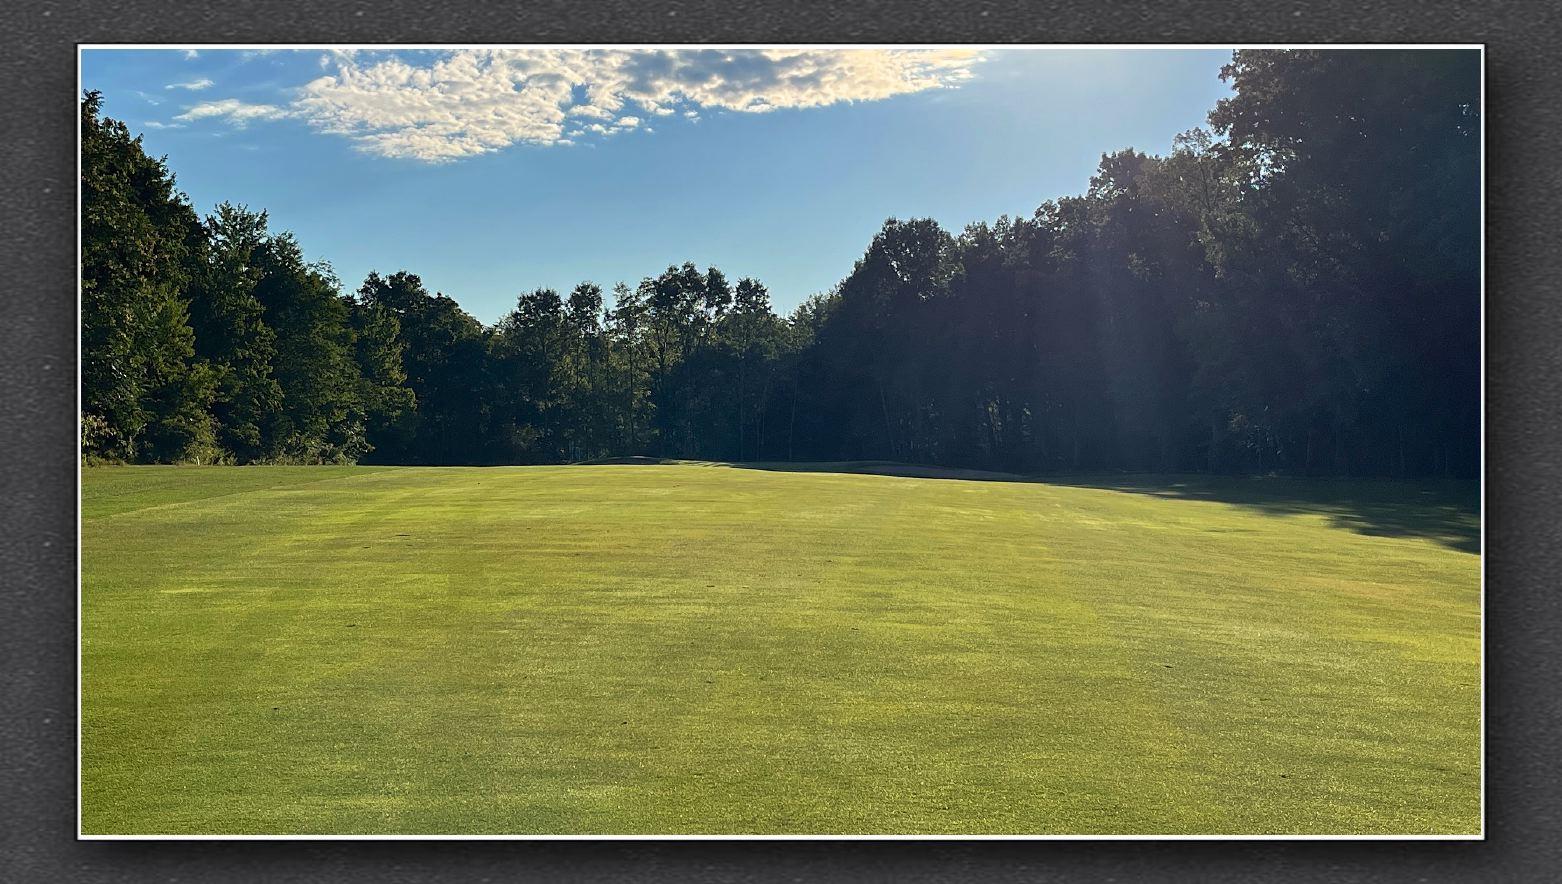
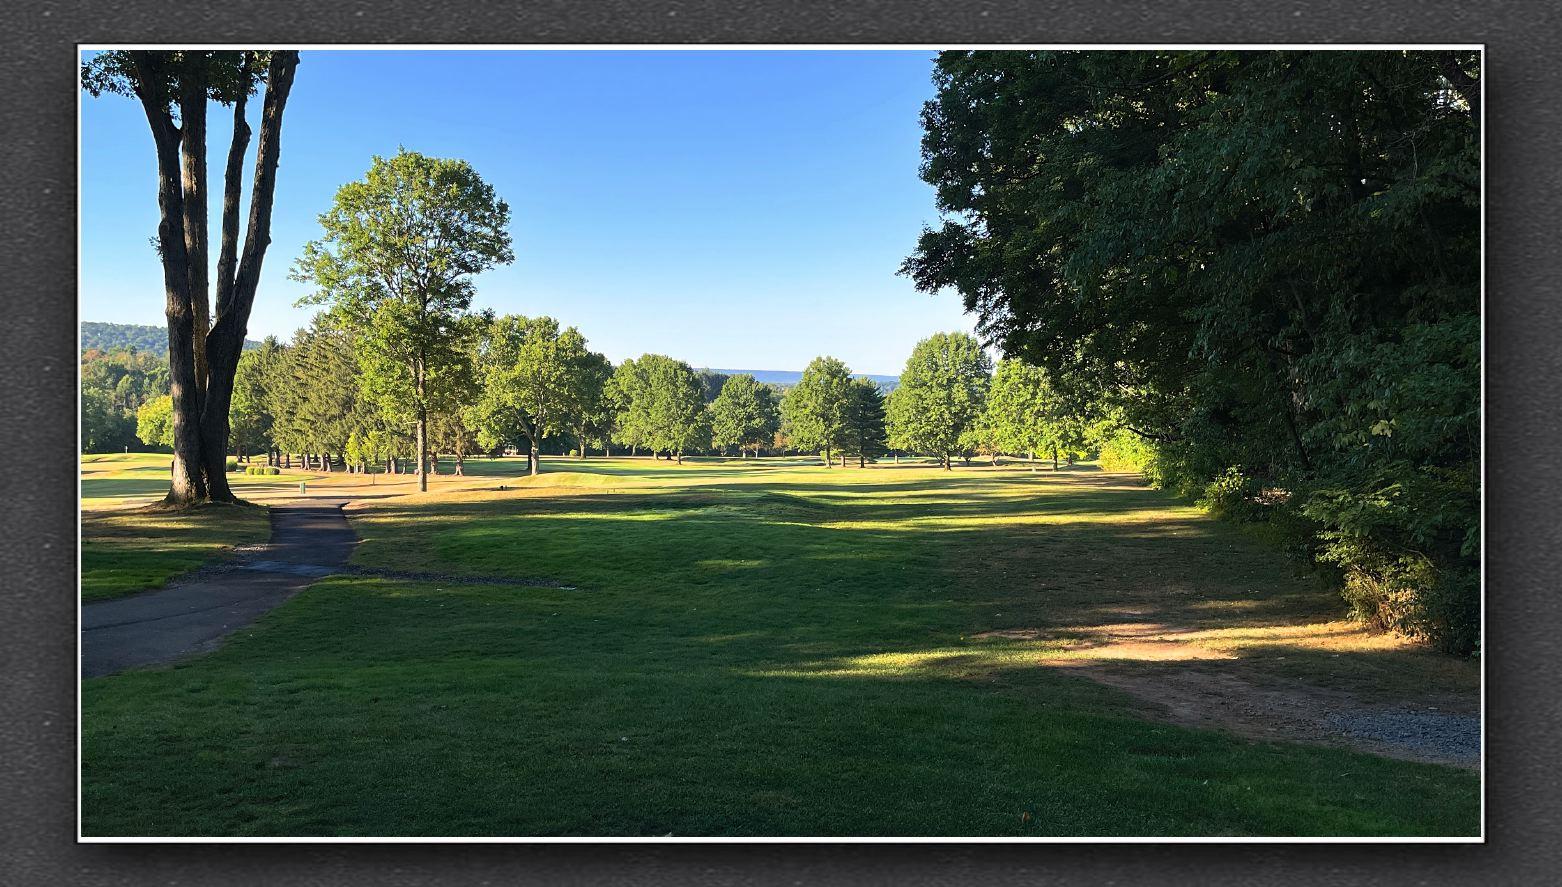
Hole 14This straight away par 5 is a scoring opportunity on the back 9. You need to have a precise tee shot as there are trees encroaching the fairway. Once you are off the tee, you have an excellent opportunity to go for the green with your second shot. The green is protected by greenside bunkers and it’s very traitorous with three small tiers on it. Be sure your shot is on the proper tier to make this a great scoring hole. |
|
|
|
| Black | White | Yellow | Green | Red/Green |
| 486 | 473 | 435 | 414 | 414 |
| Par | Handicap | ||
|---|---|---|---|
| Men | Ladies | Men | Ladies |
| 5 | 5 | 12 | 4 |
Hole 15A slight dogleg left par four, you want to position your tee shot on the right side of the fairway to get a good angle for your approach. After a good tee shot, you’ll likely be left with a mid to long iron approach to the green. The green is protected by a bunker on the left side and runs from front to back so you will want to land your approach shot short of the flag. The safer play would be to aim slightly right of center, giving yourself a better chance of staying on the green while avoiding the bunker. |
|
|
|
| Black | White | Yellow | Green | Red/Green |
| 454 | 447 | 370 | 322 | 322 |
| Par | Handicap | ||
|---|---|---|---|
| Men | Ladies | Men | Ladies |
| 4 | 4 | 6 | 10 |
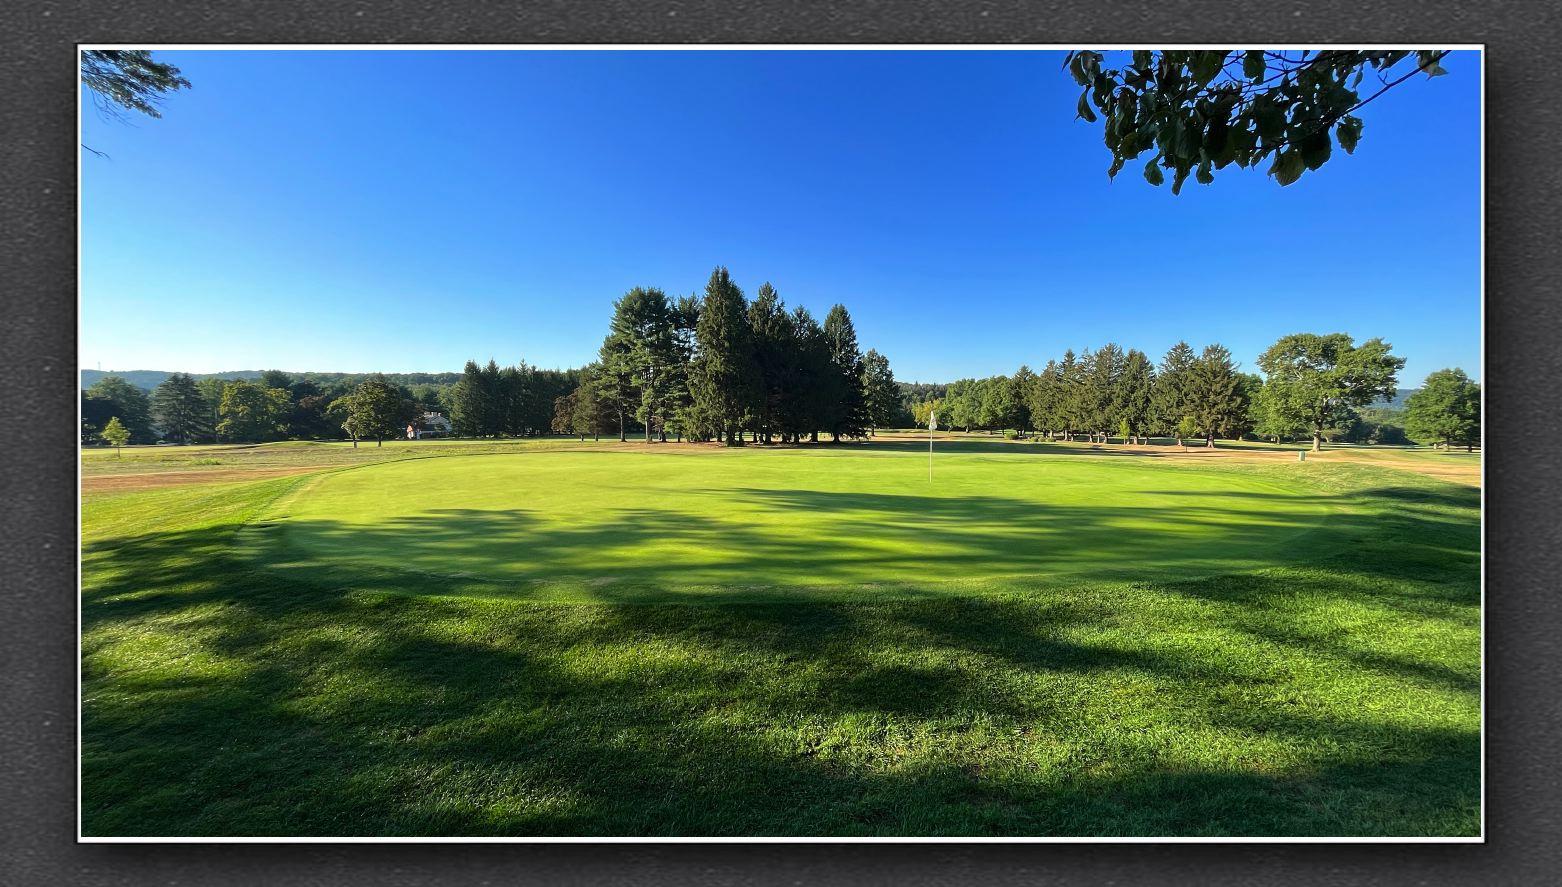
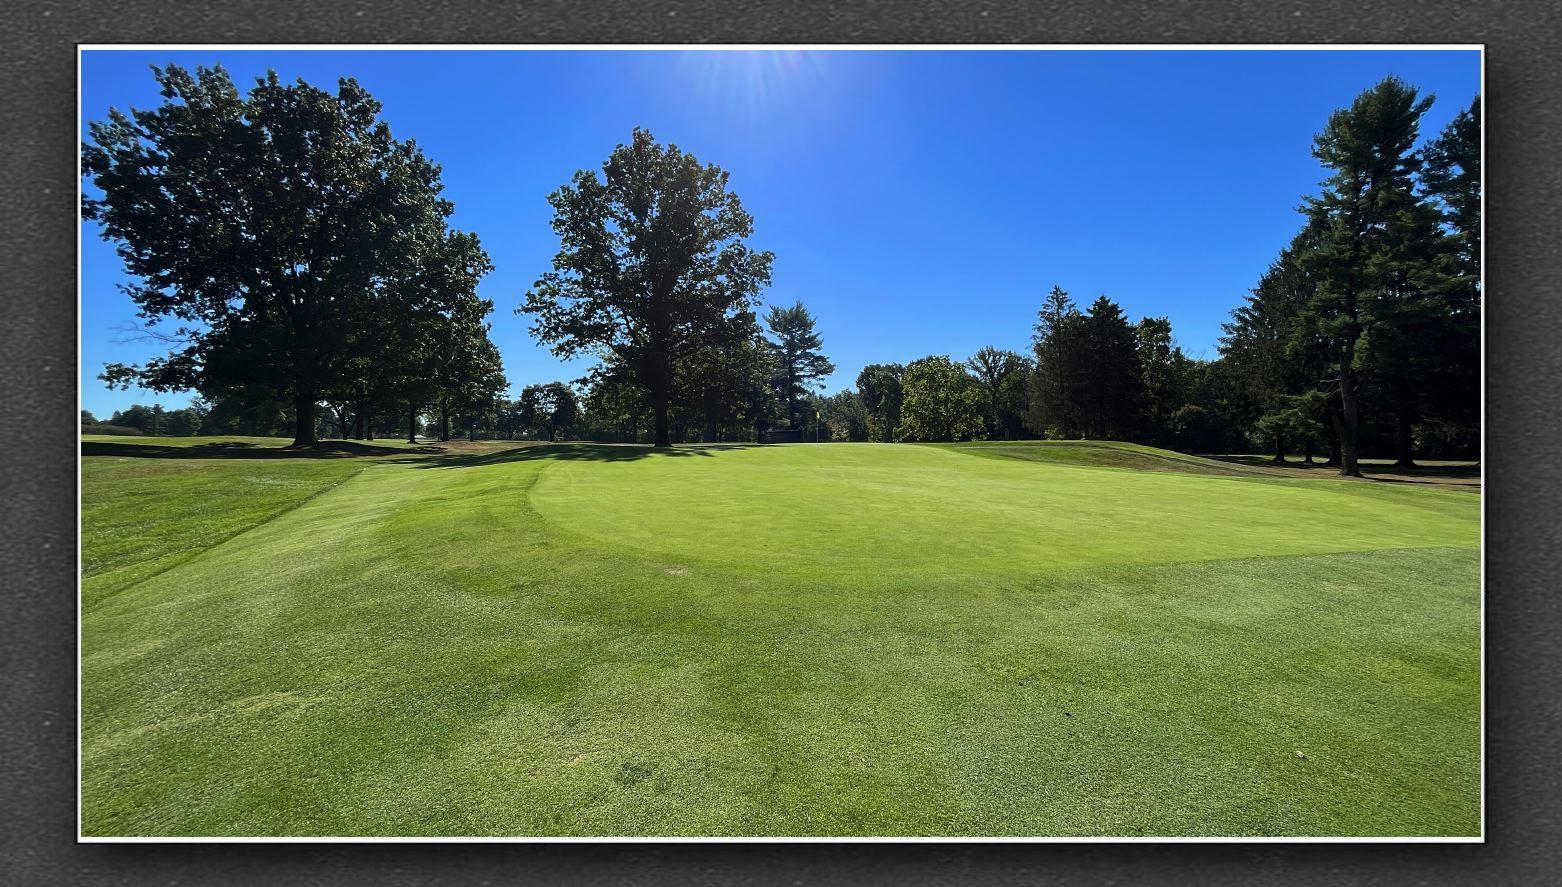
Hole 16This slightly uphill Par 3 with a back to front sloping green, gives you a great opportunity to have a Hole-In-One. Take an extra club to be sure you get to the green. Play to the middle of the green and the ball will funnel back to the hole when the pin is in the front. A precise shot is required when the pin is in the back, don’t go long. With bunkers protecting the front, you need to be careful not to come up short. |
|
|
|
| Black | White | Yellow | Green | Red/Green |
| 134 | 128 | 120 | 118 | 92 |
| Par | Handicap | ||
|---|---|---|---|
| Men | Ladies | Men | Ladies |
| 3 | 3 | 16 | 16 |
Hole 17The key is positioning your tee shot in the center of the left to right sloping fairway. Being on the right side of the fairway also sets you up for a better angle into the green. An errant tee shot on either left or right, could put you in high fescue grass. The fairway narrows as you approach the green so be cautious with your club selection. Be sure to stay clear of the fairway bunker short of the green. The two greenside bunkers are another danger to consider. Being just short of the green is not a bad play. The green slopes from back to front and left to right. |
|
|

|
| Black | White | Yellow | Green | Red/Green |
| 533 | 521 | 494 | 452 | 446 |
| Par | Handicap | ||
|---|---|---|---|
| Men | Ladies | Men | Ladies |
| 5 | 5 | 8 | 2 |
Hole 18A great finishing hole with the clubhouse surrounding the green. This slight dogleg right par 4 has a fairway bunker. A long driver fade could potentially put you in the bunker or push you into the trees. A pull to the left will put you in fescue grass, making your second shot difficult. After a well-placed tee shot, you’ll likely have a mid-iron or short iron into the green. Your approach shot plays uphill, so you will need an extra club. The green is surrounded by bunkers on the right and left and a steep hill to the right of the green. Play our approach shot to the right of the pin and let the slope take your ball closer to the hole. |
|
|
|
| Black | White | Yellow | Green | Red/Green |
| 399 | 375 | 344 | 342 | 255 |
| Par | Handicap | ||
|---|---|---|---|
| Men | Ladies | Men | Ladies |
| 4 | 4 | 10 | 12 |

Golfing SCC with Jake Stoutland
Jake Stoutland at Schuylkill Country Club
Jake Stoutland, a YouTube Influencer, visited Schuylkill Country Club in August 2025 to play a round and give his take on the course, the layout, and the club. Jake is very knowledgeable in the architecture with a passion for golf and storytelling. He was featured on the “Chasin' Birdies” podcast (episode “Uncovered Stories – Jake Stoutland”) in April 2025, where he discussed his background, and golf experiences in the Northeast and Long Island. We were honored to have Jake visit SCC.
Click to View YouTube Short Version
Traveling Golfer
The Traveling Golfer, Yuengling Brewery & Schuylkill Country Club
In 2023, Schuylkill Country Club had the honor of hosting the filming of the Philadelphia Sports show, The Traveling Golfer. The episode, titled "Yuengling, America's Oldest Brewery," featured long-time SCC member Dick Yuengling as he played a few holes at SCC and took viewers on a tour of the Yuengling Brewery.
Thank you to Dick Yuengling and the Traveling Golfer TV show for including SCC in this special presentation. Click the link to watch the episode!
